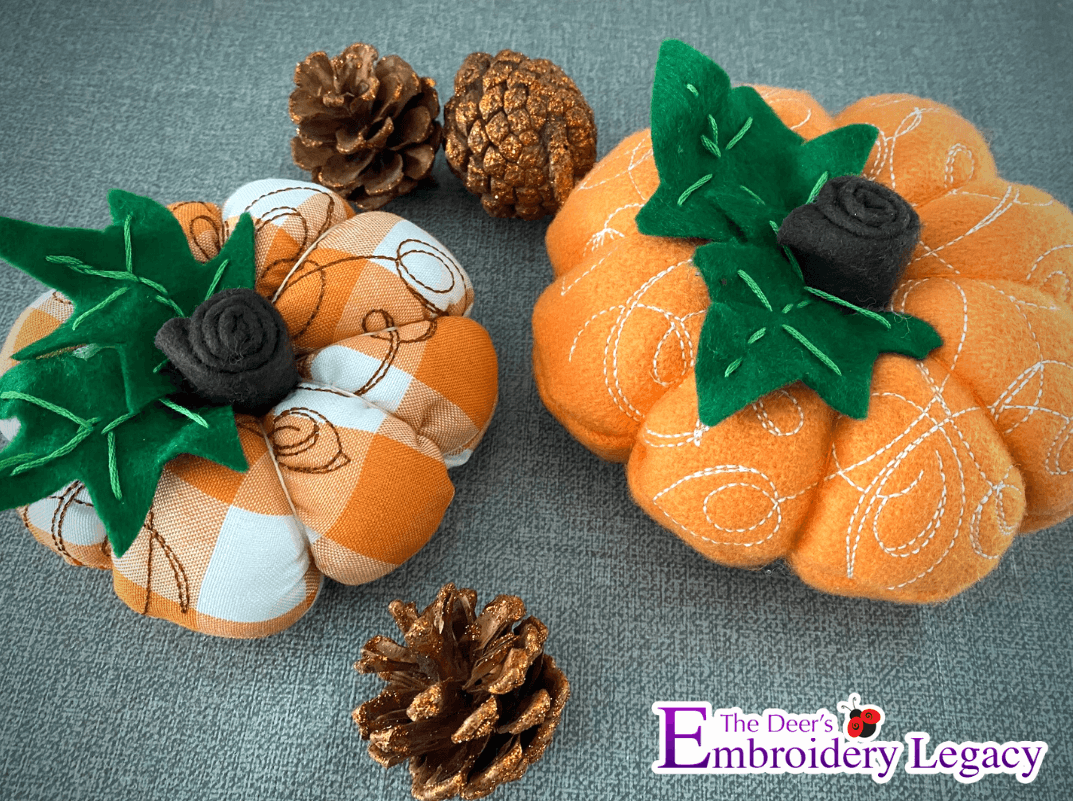
What’s the first thing that comes to mind when you think of the Fall season and Thanksgiving holiday? Pumpkins, of course! Although decorating for Fall and Thanksgiving can be pricey, we have a way to decorate without the hefty price tag while still adding flair to your home.

Are you interested in Fall decor that looks pricey but only has you paying a fraction of the cost? (We won’t tell if you don’t). Follow our steps outlined in this project tutorial to create your own personalized embroidered pumpkin decor to bring that fall magic to life!
Why Create This Easy DIY Embroidered Pumpkin?
When you create this embroidered pumpkin, you can personalize it to your taste and mix and match new designs for a different look wherever your pumpkin may embellish. Changing your fabric, thread color, or embroidery design on your pumpkin will ensure the quality is to your standards and the style is your personal preference.
No one likes the big price tag associated with elegant fall decor, so why pay it? This embellished pumpkin can easily be made with fabric scraps (we know you have a fabric stash), and since you can alter looks, why not use a different fabric for the top and bottom of the pumpkins, depending on what you already have on hand.
These embellished embroidered pumpkins are great decor for on top of your fireplace, the middle of your Thanksgiving table, or even elegantly displayed beside your TV. Your options are endless as they can be tastefully displayed in any room of your home. These easy DIY embroidered pumpkins also make great gifts! Whether you’re hosting Thanksgiving or need to bring a gift to the dinner you’re attending, these will surely be a hit! See the surprise and excitement when you tell them, yes, I made this!
Supplies Required For This Easy Embroidered Pumpkin Decor

- Decorative embroidery design (we used Art Deco Embellishments 123)
- Stabilizer
- Fabric of your choice, size will depend on how large you want to make your pumpkin (sample uses 10”x 20” fabric)
- Fill for pumpkin (either batting, stuffing, or fabric scraps)
- Object to draw circle shape (I used a bowl from my kitchen)
- Fabric marker
- 2” x 9” brown felt
- 4” x 5” green felt
- Hand embroidery thread
- Scissors
- Needle and thread, long darning needle
- Sewing machine or hot glue gun
Now, keep in mind, you don’t have to use this design for your embroidered pumpkin. To really personalize your custom embroidered pumpkin, you can choose from our giant database of close to 30,000 quality embroidery designs, or you can create your design text or image with our free 30-day Hatch embroidery software trial!
Decorative Embroidered Pumpkin Tutorial:
Step 1:
Choose your pumpkin decorative embroidery design, download it to your USB and insert into your embroidery machine.
Hoop your pumpkin fabric with a stabilizer underneath. With my fabric, I used a no-show mesh.
Make sure your design size is smaller than your pumpkin size, so you’re not later cutting your design.

Step 2:
Embroider your design.
Using a fabric marker, draw an outline of your bowl or whatever you’re using to make a circle.
Create 2 outlines.


Step 3:
Cut out both fabric circles and place them on top of each other. The fabric you want to display (the one with the correct side of the embroidery design) should be facing inward on top of each other.
Pin the sides together.


Step 4:
Sew around the outside of the circle, leave a small opening, turn the fabric right side out.
(If you do not have a sewing machine, you can hand stitch or use a hot glue gun to close the fabric)


Step 5:
Fill with batting, stuffing, or fabric scraps until reasonably firm.
Sew the opening closed.


Step 6:
Thread a long darning needle with hand-embroidered thread or twine. Use a color that either blends into your fabric or stands out depending on your taste.
Depending on the fabric you use, you may need a small button as an aid at the bottom of your pumpkin, so the knot doesn’t pull through your fabric.
You will need to pull quite hard on the thread or twine to make the segments.
Tie a knot to secure the button before stitching.
Locate the center of the circle and poke the needle all the way through the other side.


Step 7:
When the needle is on the top side of the pumpkin, pull the thread across the top and around to the bottom and then up through the center button again to the top. This is creating your pumpkin sections.
Pull the thread to the opposite side, splitting the circle in half.
Repeat this process splitting the halves in half until you’ve created as many segments as you like.
Tie a knot in your thread at the bottom of the pumpkin when you’re finished.


Step 8:
Draw a leaf shape out of paper and then transfer it to your green felt or fabric (or simply free hand cutting on the felt).
Cut 2 leaves either the same size or different.


Step 9:
Fold the brown felt almost in half, then roll it up to make a stem for your pumpkin.
Glue or sew to secure the end.


Step 10:
Sew or glue the leaves and stem in place. Voila! You’ve created your embroidered decorative pumpkin embellishment.

Conclusion: Create This Easy Embroidered Pumpkin Decor
With the ability to produce multiple different looks, be budget-friendly, and an easy gift for the Fall and Thanksgiving season, why wouldn’t you make this easy embroidered pumpkin decor? Whether you’re looking to add some Autumn flair to your Thanksgiving table, give a thoughtful gift, or create home decor on a budget, this is the right project for you.
P.S. If you want to create different embroidered decorative pumpkins, browse through our giant collection of machine-friendly embroidery designs. Plus, check out our Embroidery Legacy Design Club to learn how to save on our entire database of close to 30,000 quality designs. Or, if you’ve never tried our designs before, download our free Embroidery Legacy Design Kit.
Happy stitching!

Leave A Comment