Are you looking for the perfect little embroidered gift for your friends or family that is functional yet cute for this Valentine’s Day? (Yes, we suggest making one for yourself too!)

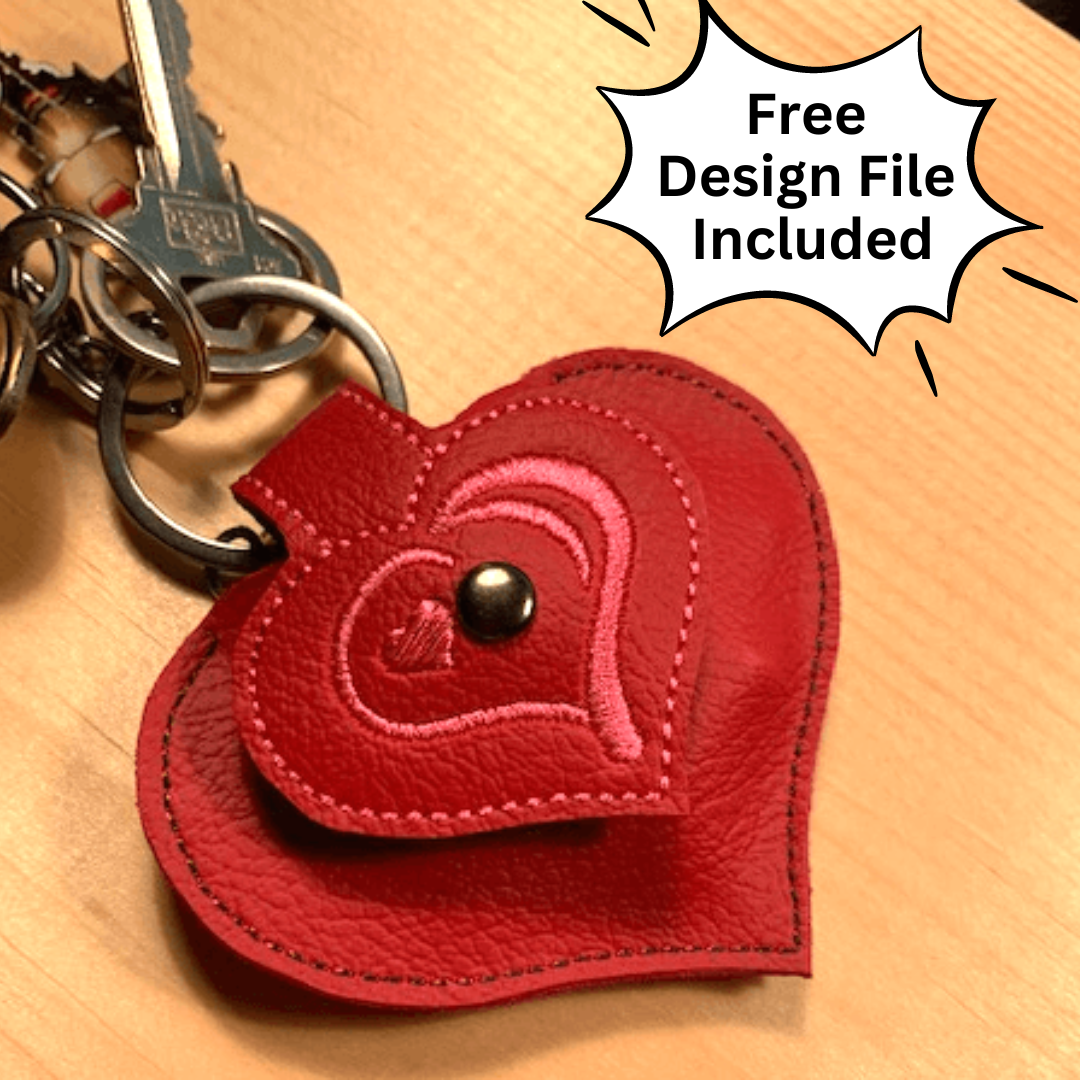
In this tutorial, we have a cute Valentine’s Day pocket keychain to keep your little extras safe and close at hand. Plus, did we mention we’re also giving you this in-the-hoop embroidery design for free?
Why Embroider This Cute Pocket Heart Keychain
This Valentine’s Day pocket charm makes the cutest Valentine’s Day gift for friends and family. Customize each embroidered pocket heart key chain using different colored materials or threads. The materials are easy to find, and you can recycle materials from old furniture, jeans, bags, and more!
They make a great addition to any keychain. They are super fun as things can be stored in the heart’s pocket, like a USB drive, lip balm, a spare dollar or two for little emergencies, and, yes, yummy chocolates!
This easy project can be made quickly if you want to make multiple (we know you want one of these cute projects on your keychain too)! Let’s begin.
Supplies Needed To Make An Embroidered Pocket Heart Key Chain
- 3 vinyl or scrap leather pieces (2 pieces cut at least 5×5 inches, 1 piece cut 5×2 inches)
Get your complete guide to embroidering on leather and vinyl.
- Tear away stabilizer
Want to learn more about stabilizers? Check out our embroidery stabilizer guide.
- Magnetic or Kam snaps
- Painters tape
- Embroidery machine
- Embroidery thread
Learn about different types of embroidery threads & when to use them.
- Spray adhesive
Learn how to master using embroidery adhesives without the headaches!
- Scissors
There are 5 things you need to know about embroidery scissors. Read about it now!
- Permanent marker (optional – if you do use a marker, choose a color close to your leather/vinyl fabric)
- Your Free Embroidery Design – Pocket Heart Key Chain Project
Thank you to Christine Buhr for this project’s embroidery file.
Easy DIY Embroidered Pocket Heart Holder Tutorial
Step 1: Hoop a piece of tear-away stabilizer.
Learn great embroidery hooping tips and tricks for professional results.

Step 2: Use a light spray of embroidery adhesive to tack a piece of vinyl or leather 5×5 inches to the BACK side of the hoop.
Reminder, when using spray adhesives, always spray the fabric before you put it on your hoop (do not spray the stabilizer or fabric that is hooped as this will gum up your hoops).

Step 3: Turn over the hoop and tack a piece of vinyl or leather 5×5 inches to the FRONT of the hoop.

Step 4: Place your hoop in the machine and stitch.

Stitch until all that remains is the last line. (Below is what the back of the hoop should look like)

Step 5: Remove the hoop and, placing face DOWN, secure a piece of vinyl or leather over the stitching line of the large heart, ensuring it is covering the stitching line and overlapping by at least ¼ inch.

Step 6: Return the hoop to the machine and stitch the final line.
Step 7: Remove from the hoop and tear away the stabilizer.
Step 8: Trim the edges of the pocket.
Step 9: Using a permanent marker, you can color the sides of the seams. Color them in.
Step 10: Secure a plastic, metal, or magnetic snap to each side of your hearts to act as a closing pocket.
Step 11: You are DONE! Wasn’t that easy?

Conclusion: Embroidered Pocket Heart Key Chains Are Easy & Fun!
These cute pocket heart key chains are great Valentine’s Day embroidery gifts! Not only do they let you spend that extra time in your sewing room, but they also let you make something functional (and super cute!) for your loved ones or yourself.
P.S. Check out other high-quality embroidery designs to perfectly embellish your next embroidery project!


Leave A Comment