So you’ve just purchased your new Hatch digitizing software and are eager to begin creating your own embroidered project, or maybe you’ve had the software for a while but just don’t know where to start…

Although this software has an easy-to-use interface, sometimes easy-to-follow tutorials are just what you need to spark that creativity and learn how to use your digitizing software to its full potential. Keep reading for step-by-step tutorials by our lovely Facebook Admins to get started!
Are you new to Hatch and want to participate in our tutorials before taking the step in purchasing? No problem! Try it like you own it with a free 30-day Hatch trial by clicking here.
Interested in purchasing Hatch software? Here at the Embroidery Legacy, we offer exclusive bonuses with your Hatch software purchase that you won’t find anywhere else. Click here to learn more about our Hatch bonuses.
Hatch Project Tutorials
In-The-Hoop Easter Egg Money Holder

This ITH Easter Egg Money Holder Tutorial is by Linda Rayburn
Remember to download the artwork file for this project below.

-
Bring in the Artwork and resize to 100mm. Lock the artwork in place by tapping K on your keyboard
-
Digitize Closed Shape > Outline> Single Run Stitch. Digitize around the egg.

3. Duplicate the Egg 2 times and change the color of each one.
4. Select the third Egg > Change to a Fill > Select Ripple Fill > Change the Spacing to 6mm and leave the Length at 2.5mm
a. The first Egg outline will be a Placement Stitch, The second Egg outline will be the Tackdown Stitch for the fabric and the Mylar. The third Egg will sew over the Mylar to hold it in place.

5. Duplicate the Egg and change to a new color.
6. Change to a Motif Fill > Blackwork > NBW12.
a) Change the Motif Width to 19.28mm the Height will change in proportion when it is locked.
b) Change the Row Spacing and Column Spacing to 12mm.
7. Select Object Properties > Effect > 3D Warp > Globe out
Note: Be creative and try other Motifs if you’d like.

8. Duplicate the Egg and change to a new color.
9. Change to Motif > Single Motif Cross 13
a) Change the Motif width to 6mm.
b) Change the Row Spacing and Column Spacing to 12mm.
10. Select Object Properties > Effect > 3D Warp > Globe out

11. Duplicate the Egg > Change the color > Change to Outline > Single Run Stitch.
a. This will be the tackdown for the backside of the Egg.
12. Duplicate the Egg > Change to a Zig Zag Stitch > 2mm
a. This will be an extra Tackdown to secure the Front of the Egg to the Back.
13. Duplicate the Egg > Change to Satin Stitch> 4mm
a. Change the Underlay to Edge Run and Zig Zag.
b. Increase the Pull Comp to .25mm to add a little extra coverage when stitching.

Stitching the ITH Easter Egg Money Holder:
Supplies:
-
1x Front of Egg-Fabric 5” square
-
1x 5” Piece of Mylar
-
2x Back of Egg – Fabric 5” square with one folded in half
-
Water Soluble Stabilizer
-
Bobbin wound with same color of thread used for the satin border\Scissors
Did you know we offer magic sparkle sheets? Click here to get yours now.
Steps:
-
Hoop the Water Soluble Stabilizer and stitch the Placement line for the Egg.
-
Lay down the Front of Egg fabric with the Mylar. Tape in place. Stitch the Ripple Fill over the egg. Stop your machine and trim around fabric and Mylar very close to the stitching line.
-
Stitch the 2 Motif patterns. Stop your machine.
-
Remove the hoop and turn it over. Lay the 5” Square back fabric with the folded piece of fabric with the bottom edges even over the egg. Tape in place.
-
Place the hoop back on your machine. Stitch the Run Stitch Tackdown Line. Stop your machine. Remove the hoop and trim around the back side of the egg very close to the stitching line.
-
Place the hoop on the machine. Stitch the Zig Zag stitch and the final Satin Stitch border.
-
Trim the stabilizer close to the satin stitch being careful not to cut it. Remove any excess stabilizer by dipping your finger in warm water and going around the edge.

Now stitch out your own ITH Easter egg money holder & fill them with special treats!
Be creative, try using different motif combinations. Personalize your egg by stitching a name on the folded piece of fabric before stitching it to the back. To check out other ESA fonts and glyphs click here.
Join our Wilcom Hatch Embroidery Software Facts Facebook group by clicking here. Submit a picture of your project stitch outs in our Facebook group post by clicking here for your chance to win a free ESA font of your choice from our ESA Font website, where we offer close to 1,000 ESA fonts that you can browse by clicking here. Or, if you have any questions regarding this Hatch tutorial, feel free to ask for some guidance and answers!
Interested in downloading this Hatch tutorial? Feel free to save this easy step-by-step Hatch tutorial in PDF format by clicking the button below.
In-The-Hoop Stuffie Bunny

This ITH Stuffie Bunny Tutorial is by Linda Rayburn
Remember to download the artwork file for this project below.

- Bring in the Artwork. It should be approximately 100mm x 100mm. You can make this larger if you’d like.
Note: The Bunny with the Blue ears is 5” and the Pink eared Bunny is 4”
a) Lock the Artwork by tapping K on your keyboard
2. Select Digitize Open Shape > Stem Stitch. Change the settings to Width 1.0mm, Stitch Angle 60°, 3 Strokes.
a) Digitize around the left foot
3. Select Digitize Open Shape > Run Stitch. Digitize from the left foot over to the right just below the egg.
a) Change back to Stem Stitch and digitize the other foot.

4. Digitize Open Shape > Run Stitch. Digitize the finger detail of the paw.
a) Change to Stem Stitch and digitize the outline of the paw.
5. Select both paw pieces > Create Layout > Mirror Copy Horizontal. Move the Cursor so it is in the middle > Left Click to generate the stitches of the other paw.

6. Digitize Open Shape > Triple Run. Digitize the whiskers on one side then Mirror Copy Horizontal to the other side.
a) Continue Digitizing the remaining outline on the body of the bunny using the Triple Run and Stem Stitch.

7. Digitize Blocks > Satin Stitch. Digitize the Eye. With it selected > Create Layout > Create Outline > Single Run.
a) Mirror Copy Horizontal
8. Digitize Closed Shape > Fill > Tatami > Digitize the Nose > Add an Outline
9. Digitize Blocks > Satin Stitch. Digitize the pads of the foot and add an outline
a) Select them all > Mirror Copy Horizontal

10. Digitize Closed Shape > Outline > Single Run. Digitize around the inside of the Ear and around the Egg
a) This will be the Placement line for the Appliques.
11. Select the Ears and the Egg > Duplicate > Change the color > Change to a Triple Run
a) This will be the Tack down line for the Applique.
For Fun: Instead of Applique you can always use Motif fills for the ears and egg.

12. Digitize Open Shape > Triple Run. Starting at the bottom left side of the bunny, digitize all around the bunny Stopping at the bottom right paw.
a) It is very important to leave an opening at the bottom of the bunny so you will be able to turn the fabric right side out after sewing.
13. Select the outline > Backtrack. This will stitch back over the outline reinforcing the stitching.

Stitching the ITH Stuffie Bunny:
Supplies:
- Fabric for the Front and Back of the Bunny
- Fabric for the Ear Applique
- Fabric for the Egg Applique
- Light Weight Cut Away Stabilizer or No Show Mesh Stabilizer
- Stuffing
- Needle and Thread
- Hoop the Fabric for the Front of the Bunny (Right Side Up) with the stabilizer
- Stitch the design including the Placement lines for the Appliques. Then Stop the machine.
- Lay down the Applique Fabrics. Stitch the outline. Stop the machine and trim close to the edge.
- Lay down the fabric for the Back side of the Bunny -Wrong Side Up. Use a few pieces of tape to hold in place.
- Stitch the outline around the Bunny.
- Use a pinking shear to Cut the fabric at the opening 1” from the edge so you have enough fabric to turn in and stitch closed. You then can trim ¼” around the edge of the bunny.
- Carefully turn the Bunny right side out. Use a fabric turner or the end of a paint brush to help push out the ears. Note: This does take a little patience.
- Stuff the Bunny and hand stitch the opening closed.

Now stitch out your own ITH Stuffie Bunny!
Join our Wilcom Hatch Embroidery Software Facts Facebook group by clicking here. Submit a picture of your project stitch outs in our Facebook group post by clicking here for your chance to win a free ESA font of your choice from our ESA Font website, where we offer close to 1,000 ESA fonts that you can browse by clicking here. Or, if you have any questions regarding this Hatch tutorial, feel free to ask for some guidance and answers!
Interested in downloading this Hatch tutorial? Feel free to save this easy step-by-step Hatch tutorial in PDF format by clicking the button below.
Celtic Circle Monogram Frame with Puff Stuff

This Celtic Circle Monogram Frame with Puff Stuff Tutorial is by Linda Rayburn
This week’s Friday Try Day will stitch out beautifully on its own, but you can take it to a new dimensional level using Puff Stuff™ topper.
You will discover unlike 3D foam, no additional adjustments need to be made to the design when using Puff Stuff™ for beautiful results.
Remember to download the EMB file for this project below.

1. Bring Celtic Circle Design on screen > Size to 110m x 110mm > Center on Screen > Place 0 in X and Y Position
2. Select the Circle > Create Layouts> Create Outline. Make sure you select another color other than green.
3. Select the Inner Outline > Change to a different color.

4. Select the Color Tab on the Sequence Docker.
5. Select the Red Outline objects and Delete them.

6. Select the Yellow Outline > Create Layouts > Un-Check Outlines and Select Offset
a) Set the Offset to 5mm and Check the Include Holes box
7. Select the Yellow Outline and the Outside Purple offset and Delete them.

8. Select the Outline > Change to Fill > Change to Motif > Blackwork > Cross 10 > Change to your desired color.
9. Duplicate the object > Change to an Outline > Satin Stitch > 2.5mm satin width. Change to your desired color.
10. Select the Satin Object > Create Layout > Outline. Change to your desired color.

11. Add your desired monogram.
a) I used the ESA Grateful 70mm font resized to 50mm
b) I did increase the Pull Compensation to .28mm to make the satin stitches a bit wider.
If you’d like to try other Celtic Circle designs click here to access the ESA Celtic Circles Glyphs.
Interested in using the ESA font Grateful 70mm used in this design? Click here.
Want to learn more about Puff Stuff? Check out our quick video regarding Puff Stuff here, or click here to watch our Puff Stuff webinar.

How to Stitch the Celtic Circle design using Puff Stuff™ topper:
1. Hoop fabric with cut away stabilizer.
Note: Puff Stuff™ can be used on a variety of materials including Canvas, Nylon, Felt, Twill, heavyweight fabrics, totebags and backpacks. Not ideal for lightweight fabrics, those that wrinkle easily, or worn garments that require frequent laundering.
2. Stitch the center fill with the satin and edge run outlines. Stop the machine.
3. Lay a piece of Puff Stuff™ topper over the design. Use tape along edge to hold in place.
4. Stitch the rest of the design.
5. Carefully trim the Puff Stuff™ ¼” around the edge of the design. You can cut the excess in the center being careful not to cut the embroidery. Save your Puff Stuff ™scraps for future projects.
6. Use Lukewarm running tap water and a soft toothbrush to gently remove the Puff Stuff from the design.
Note: This process took me less than 1 minute to remove the Puff Stuff™.
7. Lay your design flat and dry completely.

Now stitch out your own celtic circle monogram with Puff Stuff!
Join our Wilcom Hatch Embroidery Software Facts Facebook group by clicking here. Submit a picture of your project stitch outs in our Facebook group post by clicking here for your chance to win a free ESA font of your choice from our ESA Font website, where we offer close to 1,000 ESA fonts that you can browse by clicking here. Or, if you have any questions regarding this Hatch tutorial, feel free to ask for some guidance and answers!
Interested in downloading this Hatch tutorial? Feel free to save this easy step-by-step Hatch tutorial in PDF format by clicking the button below.
Kitchen Dish Rag

This Dish Soap Rag Tutorial is by Christine Buhr
This week with an eye towards “Kitchen Embroidery” we are making a kitchen soap rag which will use these Hatch Tools:
- Digitize Auto Shape
- Radial Fill
- Copy and paste to create perfect outline
You’ll need:
- 2 pieces of chamois cloth (or any absorbent washcloth which can be cut and not fray)
- 1 kitchen rag or washcloth
- 1 plastic kitchen scrubbie puff (not metal)
- Water soluble stabilizer
We are going to create a “sandwich” of a piece of chamois, a wash rag and another piece of chamois. This will be embroidered, the center cut out to push the scrubbie through, we also cut a large flower around the chamois to better soap your dishes.

- Select your hoop.
- Select Digitize > Fill > Standard Shapes > Scroll down and select the Flower > OK
- Left Click and Drag a flower in place > Double click to create it.
- Select the Flower and Resize to 90mm x 90mm (3.5”)
- When the Size box has a closed Lock – the object will be resized proportionately.
- If you Unlock it you can give your object any height or width you’d like.
-
Select the Flower and center it on your screen by placing a 0 in the X and Y Position.

We will create a hole in the flower.
5. Select the Flower > Effects > Select Radial Fill
6. Select Reshape or tap hotkey H.
7. You will see 3 square Nodes in the center of the flower. The Center Node is the center of the Radial fill.
a) Select the Node on top and drag it up. This will make the hole longer.
b) Select the Node on the side and drag it to the right. This will make the hole wider.
c) The size of the hole is entirely up to you. Make it your own.

8. We will lighten the Density of the fill. Select the flower > Change the Spacing to 1.0mm > Travel on Edge
9. Remove all underlay.

10. Select the Flower > Right Click >Select Duplicate
11. Select the Duplicate Flower > Change to an Outline > Select Satin Stitch > 4.0mm wide. > Change the Underlay to Edge Run.

12. Select Digitize > Closed Shape. Digitize a circle around the hole.
13. Change to a Satin Stitch > 4.00 mm > Edge Run Underlay.
How to Create the Soap Rag
- Stack your stabilizer and fabrics in this order and hoop them together:
- 1 piece of Water Soluble Stabilizer
- 1 piece of chamois
- 1 kitchen rag
- 1 piece of chamois
- 1 piece of Water Soluble Stabilizer
- Stitch out your design.
- Remove from the hoop and remove the stabilizer.
- Cut out the center hole and cut wide fringe fingers in the 2 chamois. Do Not cut the kitchen rag.
- Push a plastic kitchen scrubbie puff through the center hole.


Now stitch out your Flower Dish Rag and hit those kitchen dishes!
Be sure to check out our kitchen machine embroidery blog by clicking here as we discuss ideas for decorative and functional embroidery in your kitchen!
Join our Wilcom Hatch Embroidery Software Facts Facebook group by clicking here. Submit a picture of your project stitch outs in our Facebook group post by clicking here for your chance to win a free ESA font of your choice from our ESA Font website, where we offer close to 1,000 ESA fonts that you can browse by clicking here. Or, if you have any questions regarding this Hatch tutorial, feel free to ask for some guidance and answers!
Interested in downloading this Hatch tutorial? Feel free to save this easy step-by-step Hatch tutorial in PDF format by clicking the button below.
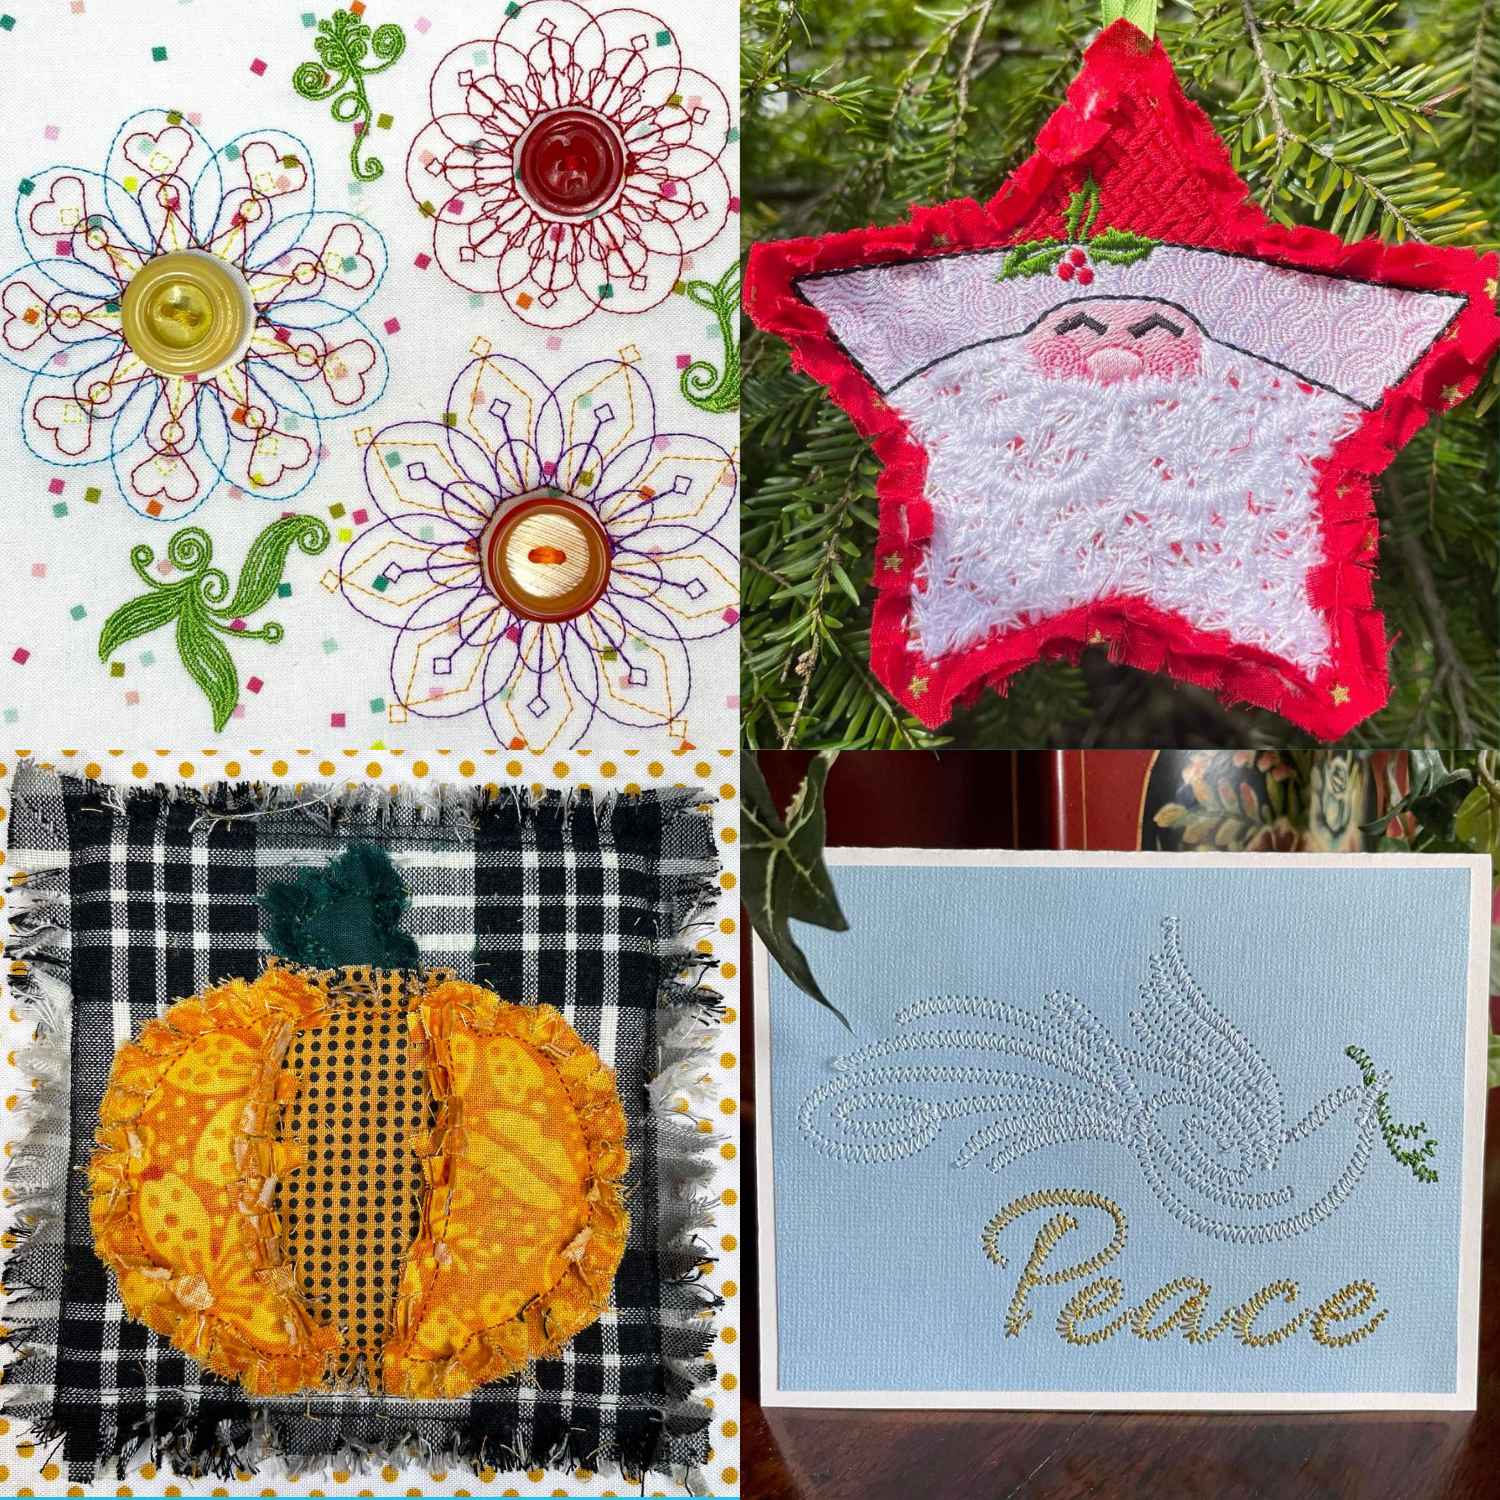
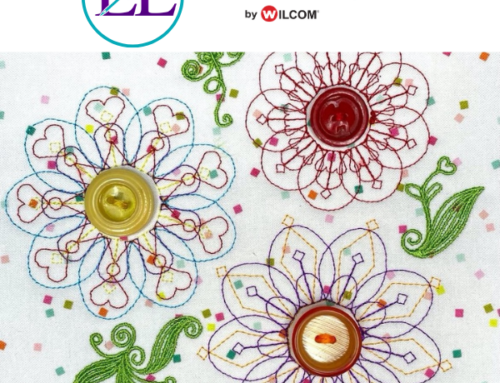
Hatch Tutorial Motif Button Flower

This Motif Button Flower Tutorial is by Linda Rayburn
We’ve had so many requests in the group about making Motifs. We had one specific request on Doodle Buttons, so here is my spin on them. Dig out your button box and come up with some amazing designs!

1. Open a New Page > Select Grid> Change the Settings to 2mm x 2mm.
a) Select Snap to Grid- Place your nodes when you see the Red Crosshair.
2. Use Digitize Open Shape-Outline placing your nodes along the grid to complete the shape.
a) Note after creating the shape make sure the Start Point- Green box is at the beginning and the Stop Point- Red X is at the end. If they are not use Reshape to move them.

3. Select the design > Select Motif- A pop up box will appear. If you have created a Motif Category before select it in the drop down menu. If not proceed to Step 4.
4. Select New to create a new Motif Category. Type in the Name of your Category ie. My Motifs > OK
5. Name your Motif- Button 1 > OK
6. A blue box will appear at the bottom of your screen asking to put in an entry and exit point.
a) Hold down the Control Key and Click on the Right and Left side of the bottom of the design. A red crosshair will line up on the grid to help you with placement.
b) A pop up will notify you have created a new pattern > OK

We will use the prior motif as a guide to create a new motif.
7. Select a new Color. Digitize Open Shape-Outline. Starting at the bottom left corner of the prior motif, place the first node.
a) Continue you around, placing the node when you see the red crosshair line up on the grid intersection.
b) Remember to check the Start and Stop points before you save as a Motif.
8. Save this as a new motif naming it Button 2 following the directions above.

9. Select a new color. Digitize and create a New Motif > Button 3
10. Select a new color. Digitize and create a New Motif > Button 4

11. Digitize a 24mm Circle-Outline
12. Change it to My Motif > Button 1.
a) Notice how the design is inside out. We will change it in the next steps
13. Select the Circle Motif > Select Run Stitch
14. Now Select Mirror Vertically
15. Finally Select the Motif again. This will reverse the motif so it goes around the outside of the circle.

16. Duplicate the Motif 3 times.
17. Finally change the duplicated motifs to the other motifs you created.
a) Keep the same color or change to other colors.

Now stitch out your Motif Button Flower and hand sew a pretty button in the center.
Have fun creating more motifs for different Button Flowers. Embellish them with leaves and stems or other designs if you ‘d like.
These would also be very cute sewn on cardstock.
Join our Wilcom Hatch Embroidery Software Facts Facebook group by clicking here. Submit a picture of your project stitch outs in our group for your chance to win a free ESA font of your choice from our ESA Font website, where we offer close to 1,000 ESA fonts that you can browse by clicking here. Or, if you have any questions regarding this Hatch tutorial, feel free to ask for some guidance and answers!
Interested in downloading this Hatch tutorial? Feel free to save this easy step-by-step Hatch tutorial in PDF format by clicking the button below.
Hatch Tutorial Partial Applique Tool

This Partial Applique Tool Tutorial is by Linda Rayburn

1. Select Digitize > Standard Shapes
2. Select Urban Border > Select the Heart HV213. Hold Down the Control Key and Right Click and drag a Heart on the screen.
3. Select the Heart > Duplicate. Move the heart so it is offset from the first heart.

4. Select All > Applique > Convert to Applique
a. Note: Convert to Applique tool can only be used on Closed Shape Objects.
b. Notice the overlapping Satin border when both appliques are created. We will eliminate this area of the Satin border in the next step.

5. Select All > Applique > Partial Applique. Notice the Satin Border is removed.

We will fine tune the Applique. These are preferences I like, please use what you prefer.
6. Select Applique Tab > Change to Trim in Place.
7. Change the Tackdown Stitch to Single Run. I find it easier to trim close with the single run vs. the Box Stitch.
a. Give the Box Stitch a try to see which you prefer.
8. Change the Satin Cover stitch to 3.5mm. I prefer a wider satin stitch on larger objects.
9. Select Stitching > Change the underlay for the Satin stitch to Zig Zag and Edge Run.
a. The Zig Zag holds the fabric to the stabilizer and the Edge Run creates a crisp edge to the Satin Border.

10. You can set your Frame Out Option. Some people prefer their machine stops and move the frame/hoop out to make it easy to access the Applique for placement and trimming the fabric. If you’d rather not have your machine move the hoop select Place Under Cover Stitches.
a. Note: When Automatic Frame Out is selected you may get an Error Message that the design is too big for the hoop.
11. Select All > Edit Objects > Break Apart. Now you will see all the objects in the Applique.
a. The Empty Boxes on the Sequence Docker represent the Frame Out. You can delete these if you’d like, they will not affect the stitching of the Applique.

12. Select the Heart > Create Layouts > Offset > Enter -1.75mm (use 1/2 the width of the 3.5mm Satin Stitch) > Bean Stitch
a. I prefer to turn off the Variable Stitch Length
13. Move the first partial heart Satin Border so it stitches just before the full heart Satin Border.
14. Add Text if you’d like!

How to Stitch the Partial Applique
1. Hoop the background fabric with stabilizer then run the Placement Line for both hearts.
2. Lay the first Applique fabric down, stitch the Tackdown Line. Trim the fabric close to the tackdown line.
3. Lay the second Applique fabric down, stitch the Tackdown line and trim.
4. Stitch the Satin borders and text.
Congratulations you have just created a two fabric Applique using the Partial Applique tool.
Now get creative and post your designs.

Have fun creating your own partial applique.
Click on the links below for a few useful links regarding this project:
- ESA Embroidery Font Maybe 25mm
- Basic Applique Video
- Applique Blog
- Give this partial applique technique a try on the Quilters Collection 2 Flexi Fill Heart Wreath

Join our Wilcom Hatch Embroidery Software Facts Facebook group by clicking here. Submit a picture of your project stitch outs in our group for your chance to win a free ESA font of your choice from our ESA Font website, where we offer close to 1,000 ESA fonts that you can browse by clicking here. Or, if you have any questions regarding this Hatch tutorial, feel free to ask for some guidance and answers!
Interested in downloading this Hatch tutorial? Feel free to save this easy step-by-step Hatch tutorial in PDF format by clicking the button below.
Hatch Tutorial Love Gylph Design

This Love Glyph Design Tutorial is by Linda Rayburn
Today’s Friday Try Day we will learn how to use ESA Flexi Fill Fonts and ESA Glyphs.
Remember to download the EMB file for this project below.
ESA Flexi Fill Fonts are made up of 1 object with 1 stitch direction. When you break it apart you unlock all kinds of creative possibilities. ESA Flexi Fill fonts are keyboard fonts and can easily be reshaped and resized.
ESA Glyphs are little designs that can be made up of many objects. The ESA Glyphs can also be easily resized. When you break apart an ESA Glyph you will be able to reshape and change their object properties.
Here are links to the ESA Flexi Fill Fonts and ESA Glyph we are using today:

- Bring in the .EMB file provided for this design using the Design Icon and finding it where you have it stored on your computer. Let’s take a closer look at them.
- Notice how the letters are made up of one object with one stitch direction. We will break them apart in a moment to unlock the object properties.
- Notice how the glyph is made up of many objects. You can easily resize it now because they are still locked together.
- If you break the glyph apart all the little objects will be separated on the Sequence Docker.
Give it a try. Select it Edit Objects > Break Apart. Notice all the objects appear on the Sequence Docker. Select the Undo Icon to bring them back together.

2. Select the L, V, E > Edit Objects > Break Apart- This will allow us to change the Object Properties and have some fun.
3. Select the E and move it so it overlaps the V.
4. Select the E and the V > Edit Objects > Weld. Now the VE becomes 1 object.

5. Select the LVE > Change to Tatami > Change the Stitch Spacing to .60mm > Check Travel On edge.
a. Select the Settings tab and Remove all Underlay
6. Duplicate the LVE

7. Select the L,VE and change the Color. Now Duplicate it.
8. Select the first L,VE change the Stitch Spacing to 3.0mm > Travel on Edge > No Underlay > Change Stitch Angle to 45
9. Select the second L,VE Change the Stitch Spacing to 3.0mm > Travel on Edge > No Underlay Change Stitch Angle to 90

10. Duplicate the L,VE and change the color.
11. Select it and change to a Motif > Circle 01. Change the Motif Width to 2.0. The height will automatically change because they are locked.

12. Select the L,VE > Select Create Layouts > Outlines and Offsets > Backstitch > Select your color
13. Move the Heart glyph to the bottom of the sequence docker.
a. Select the Heart and move in place, resize and rotate if you’d like.
14. You can resize the overall design by selecting all and entering your desired size.
a. Center the design on the screen by placing a 0 in the X and Y position.
b. Save as an .EMB file and export in your favorite machine file format.
Congratulations you have just created your love glyph design!
Now get creative & post your designs.

Join our Wilcom Hatch Embroidery Software Facts Facebook group by clicking here. Submit a picture of your project stitch outs in our group for your chance to win a free ESA font of your choice from our ESA Font website, where we offer close to 1,000 ESA fonts that you can browse by clicking here. Or, if you have any questions regarding this Hatch tutorial, feel free to ask for some guidance and answers!
Interested in downloading this Hatch tutorial? Feel free to save this easy step-by-step Hatch tutorial in PDF format by clicking the button below.

Thank you so much John, I enjoy your PDF’s & very much Friday try days. I have Hatch 3 unfortunally I didn’t get it off you but hope you will be doing lessons on Hatch 3.
Glad you enjoy them Kaye 🙂