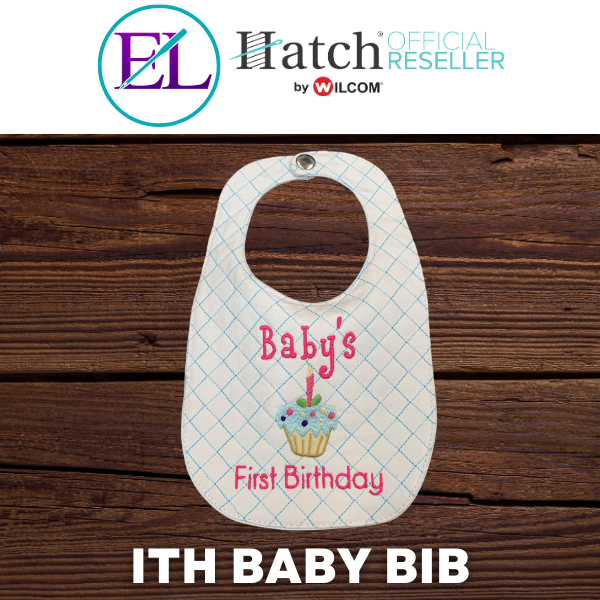
This In-The-Hoop Baby Bib Tutorial is by Christine Buhr
This tutorial teaches you how to create motif and button designs using your Hatch Embroidery Software.

Don’t have Hatch but still want to participate in this tutorial? Download a free 30-day trial of Hatch through us and we’ll even throw in some bonuses!
Remember to download the artwork file for this project below.
Step 1: Insert the Artwork
Step 2: With the Artwork selected > Click on the Lock to Unlock it > Change the Size to 7″ wide x 11″ tall.

Step 3: Select Digitize Closed Shape > Fill. Digitize around the bib.
Step 4: Change the Fill to a Motif > Blackwork > Kite. Change the size to 20mm. Change the Row and Column Spacing to 20mm.

Step 5: Select Insert Design > Select the cupcake design where you have it stored on your computer > Click Open
- Move the design where you’d like it on your bib.
Step 6: Add Text to the bib.
- ESA Boyz R Gross 20mm Font and Bretford 10mm Fonts were used in this design

Step 7: Select the Quilted Bib object and Duplicate it. Change to an Outline.
Step 8: With the Outline selected to > Create Layouts > Create Offset
- Change the Offset to -3mm with 1 Offset
- Make sure Include Holes is Not checked
- Delete the original outline

Step 9: Select the Bib outline > Edit Object > Knife tool. The outline of the bib will turn bright pink.
- Left-click on the Left side and then Left-click on the Right side of the pink line > Enter. The cut is now made.
- Repeat with the bottom line.

Step 10: Delete the cut object.
Step 11: Change the Bib outline to a Triple Run.
- This will tack down the back fabric to the front side of the bib.

Stitching the ITH Baby Bib
Supplies:
- Fabric for the front and back of Bib
- Thin quilt batting
- Tear Away or No Show Mesh stabilizer
- Snaps and Snap tool
- 8 x 12 embroidery hoop
Steps:
1. Hoop the face fabric, batting, and stabilizer.
2. Stitch the bib up to the final tackdown line.

3. Lay the back fabric on the wrong side up on top of the bib. Use some painter’s tape to hold it in place. Then, stitch around the bib.
4. Remove from the hoop. Carefully trim around the bib, leaving excess fabric at the opening.

5. Turn right side out and press.
6. Hand-sew the opening closed.
7. Place snaps on the bib using the snap tool.
Things to keep in mind:
- Since this is for a baby, make sure not to put dangling items (like beads) on which can be picked off.
- Never glue on sequins or other items that can be removed.
- Limit the texture of the bib, so it is easier to clean.
- Use polyester thread as it launders more easily.
- Use your sewing machine to Edge Stitch around the bib if you’d like.

Now stitch out your own motif button flower and sew a pretty button in the center! (They would be super cute on cardstock too!)
Have fun creating more motifs for different button flowers. Embellish them with leaves and stems or other designs as you like.
Join our Wilcom Hatch Embroidery Software Facts Facebook group for more helpful tips & tricks or any Hatch-related questions. Don’t forget to check out our 1,000+ ESA fonts to perfectly embellish your next embroidery project.


Leave A Comment