If you’re thinking about tackling the team uniform market it’s really a matter of properly planning your digitizing and production practices. Hopefully we’ll all agree that choosing embroidery and applique over silk screening definitely has more visual appeal on a set of team jerseys. Unfortunately, we’ll also agree that the pricing differences are also just as dramatic.
Like anything within embroidery production, the first and most important step is within the digitizing process. A proper understanding of how it will relate to in-house production is the key. If you are presently immersed in the corporate mindset when digitizing designs, you’re probably producing embroidery files that are programmed for left chest and cap applications. It’s funny but smaller corporate logos are for the most part more critically scrutinized and need appropriate densities, details and outlines to be considered quality work.
If you digitize athletic uniform designs with the same techniques as your corporate work you’ll find that your designs might be visually appealing but not cost effective for this market, as stitch counts get quickly out of control. When I digitize for this medium the standard logo is usually 14 inches in width and I find myself switching gears when this type of work comes in-house. You need to first look at your artwork and discern how you can keep quality while keeping the final stitch count as low as possible.
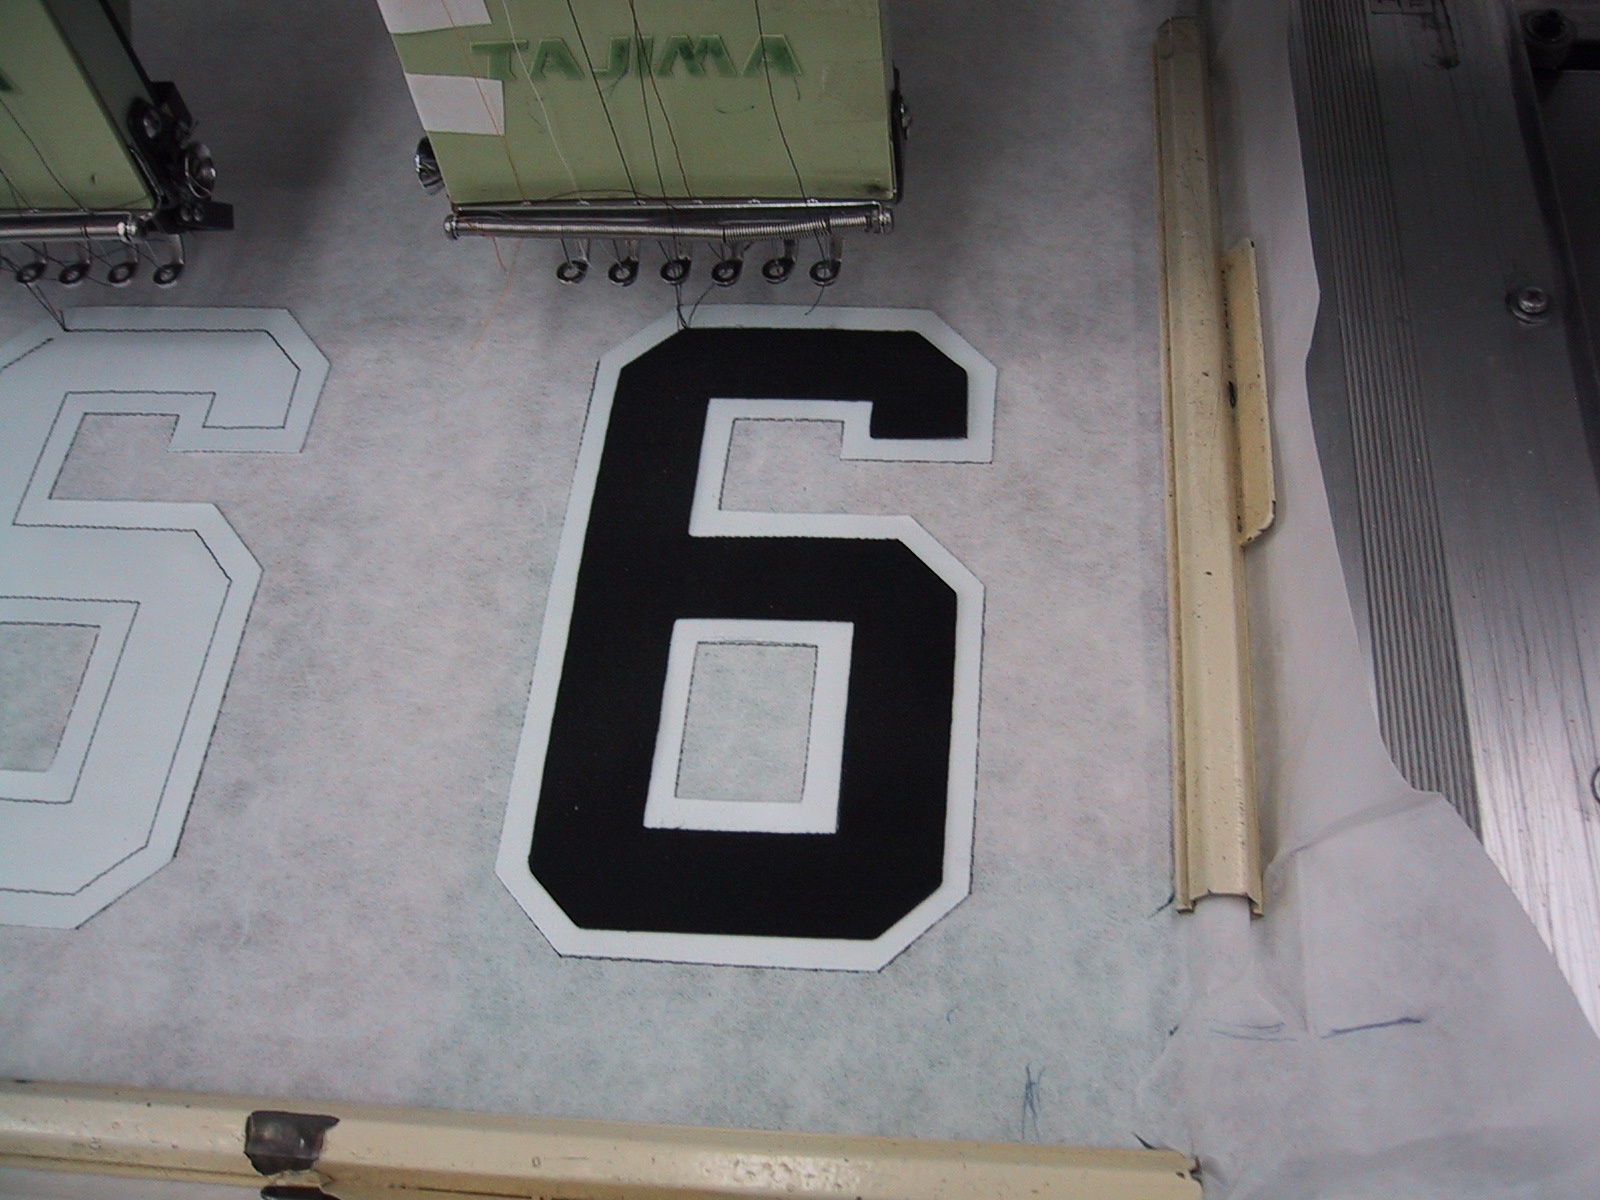
Some of you may not like the sound of this, but in this market using appliques is your best friend for staying competitive. Our first step is to assess the artwork for large coverage areas that can be replaced with multiple appliques as opposed to using fill stitches.
The major things to consider when digitizing is that you don’t need as much underlay for these large designs within your fill and column stitches, if you digitize these logos with the same values as you do left chest designs you’ll find that you can add thousand of unnecessary stitches. You can also slightly decrease your densities within your stitch types as well, because these designs are so large and the applique fabric is very stable you’ll find that using too much density will actually work against you by promoting movement. With corporate logos I’m always looking to outline my fill areas with column stitches to promote clean edges, this can also at times be overlooked to help keep the stitches down.
Probably the most cost-effective way is to use the tackle twill or zig-zag stitch method whenever possible. This can enable you to do a 14-inch full front design while keeping the stitch count extremely low, the Densmore design has under 7000 stitches. 
It all comes down to how much the customer is willing pay for the work being done. Using a column stitch applique looks cleaner and is easier to program for, but the stitch count will increase. 
In other situations more detailed designs with multiple appliques and higher stitch counts may need to be done in two steps, these designs may need to be run in their entirety as a patch that will later be stitched onto the garment. If you are embroidering through three or four layers of applique material you have a greater tendency for hard stitches while embroidering it as one process directly on the garment can run the risk of damaging goods. Running these designs on a piece of Pelon first and then creating an applique file to apply them to the garment afterward is much safer.
Now for the part everyone’s been waiting for, the dreaded split front. If any of you have had to start from scratch I’m sure you might have spent a couple hours and a lot of machine time playing with formulas that work consistently. When I start dealing with embroiderers just getting involved with doing split fronts, I try and get them in the mindset of a 14 inch rule whenever possible. Having consistency with setting up and digitizing for split fronts will save you time, especially when setting up the artwork. This method has worked consistently over the years and is easy for the machine operators to adapt to.
The most important step as always is properly prepping your artwork; a 14-inch design will always end up being 15 ¾ inches for digitizing and production purposes. First you need to set your split line on your artwork, which tells the machine operator where to lay down both sides of the garment. The right side of the garment is what you will digitize first, digitizing 7 ¾ to allow for ¾ overlap when the garment is buttoned up.
When you split the artwork leave 1 of space to allow for the buttoned seam area of the left side of the garment, then finish digitizing the left side, which is a 7-inch area. The extra ¾ inch area that you digitized first on the right side will end up covering the same distance on the left side when its buttoned up and you’ll have a perfect split front. I’ve included detailed images of the art setup measurements and a captured jpeg of the stitch file to further explain the process.
The only part of the process that you’ll need to do after the garment comes off the machine is to fold over the applique material at edge of the right seam and manually stitch it with a zig-zag machine.
This can be attempted while on the embroidery machine but it’s generally more trouble than it’s worth.
Many new embroiderers might feel intimidated to get into this market because of the size of the designs and the seemingly complicated process. But if you take the time to learn to properly digitize for the medium and how to apply it to production, it’s yet another great way to tap into a lucrative niche market.
Want more free digitizing education? Check out my free Embroidery Digitizing 101: Cheat Sheet video course now.
I hope this article helped you! If you enjoyed it or have a question please comment below now.



Thank you, great information here
You’re most welcome 🙂
Thanks for the interesting read.
My pleasure Dara, glad you enjoyed it!
Thank you for this!!! One question,since I’m largely self taught when it comes to digitizing. You used the “column tool”. Which function is this? I’m unfamiliar with Wilcom/Hatch, unfortunately, but am hoping that it is available in other programs?
My apologies, column tool and satin stitch are essentially the same. Column refers to the “old” point – counterpoint entries used in most older programs and still available in most newer software.
I am in search of the fabric that looks like embroidery stitches in metallic thread. I have a very large design and I don’t know where to
find the fabric for the applique. Help please.
Hi Leslie, it would be best to visit your local fabric store & see if they have any suggestions