Although leather and vinyl may seem very different, being organic and synthetic, they are remarkably similar in texture and how they react to embroidery.
This guide will teach you why problems arise when embroidering on leather & vinyl, and provide you with some tips and best practices to get better-embroidered results.
Embroidering on Leather
Leather can be a little more challenging to assess as its attributes will vary on the type of hide, the thickness, the quality, and how it was processed. Some hide can be very thick and have little or no stretch, such as cowhides used in leather, or melton/leather jackets, or softer quality items made from lambskin, buckskin, or suede, which generally have more give and can stretch out of shape.

Embroidering on Vinyl
Vinyl being synthetic, won’t have the variance of stretch that leather goods might have. However, what they have in common is that the penetrations made during embroidery don’t close or drawback itself as they do with fabrics, leaving permanent holes. Marine vinyl products tend to have a better result as they have woven backing, which helps hold the stitches. Regardless, too many penetrations will cut into the leather or vinyl and punch holes.
Reduce Density When Digitizing for Leather & Vinyl
That said, designs embroidered on leather and vinyl should be digitized explicitly for that purpose, much in the same way you need to digitize precisely for finished baseball caps embroidered on cap frames. Too much density in a design will cause bulletproof embroidery, numerous thread breaks, and potential needle breaks. These are disastrous, as leather goods damaged by broken needles cannot be saved and are generally higher-end expensive items. Too much density dramatically increases the stress factor when doing this type of work. Fill stitches with regular densities also tend to have a puckering effect causing a wave on the surface.
Factors To Consider When Embroidering Leather & Vinyl
- The size of your needle
- What type of thread you use
- How to hoop your item
- What kind of stabilizer you use
- Is the design you have chosen made for leather/vinyl production
Needle Size
Needle Size
To be honest, I don’t practice what I’m going to preach. But I do have a reasonably good explanation as to why. Industry experts suggest using an 80/12 leather needle when embroidering on leather as it has a wedge point in the shape of a triangle, which reduces the size of the hole made while stitching into the leather. I agree with the principle but have to be honest that I’ve never changed my needle before embroidering on leather or vinyl.
As it may seem surprising, I’ve always used a standard 75/11 for everything I embroider on. My reasoning is merely economic. When my family ran production, we had 136 multi-head running in our factory alone, and we created designs for our partner’s factory, which ran over 300 multi-heads. Can you imagine changing just needles 3, 5 and 6 on a twelve needle, twenty-four head machine for a run of 300 jackets and then having to change them back? It would be a logistical nightmare as we ran three shifts with different operators and floor managers. Keeping track would have been a nightmare, and the downtime alone with just changing needles would have drastically affected profits.
So, then the question is, how can you get quality results without changing the needles? It all comes down to how the design is digitized. If you’re not familiar with embroidery digitizing, click here. A design properly digitized specifically for leather will primarily produce the same results regardless of changing the needles for a specific use. In production, our policy for changing needles was simple; we replaced them when they broke or when a thread would fray consecutively two or three times in a row.
Thread Of Choice
When I ran production, Rayon was the industry standard, but luckily today’s thread of choice is Polyester which is much stronger. Using Rayon meant designs had to be digitized with low densities as it is not nearly as strong as today’s polyester. To learn more about the different types of embroidery thread available, click here.
Hooping Technique
The other factor to consider when embroidering leather or vinyl is hooping. Both can be difficult to hoop because of the thickness of the item, and leather does tend to scuff or permanently mark. If you do hoop both sides within the leather, I suggest creating a “felt window” that acts as a barrier between the hoop surface and leather. Doing this will reduce the chances of scuffing the surface of the leather and can be repeatedly used.

I do remember situations while embroidering on delicate leather/suede, where I would float the item on a hooped piece of stabilizer. I did this to ensure it wouldn’t move. To reduce puckering, we would always use some temporary spray adhesive sprayed on the stabilizer and then laying the leather down. If I can hoop the item, I will, but if not, floating is a good option.

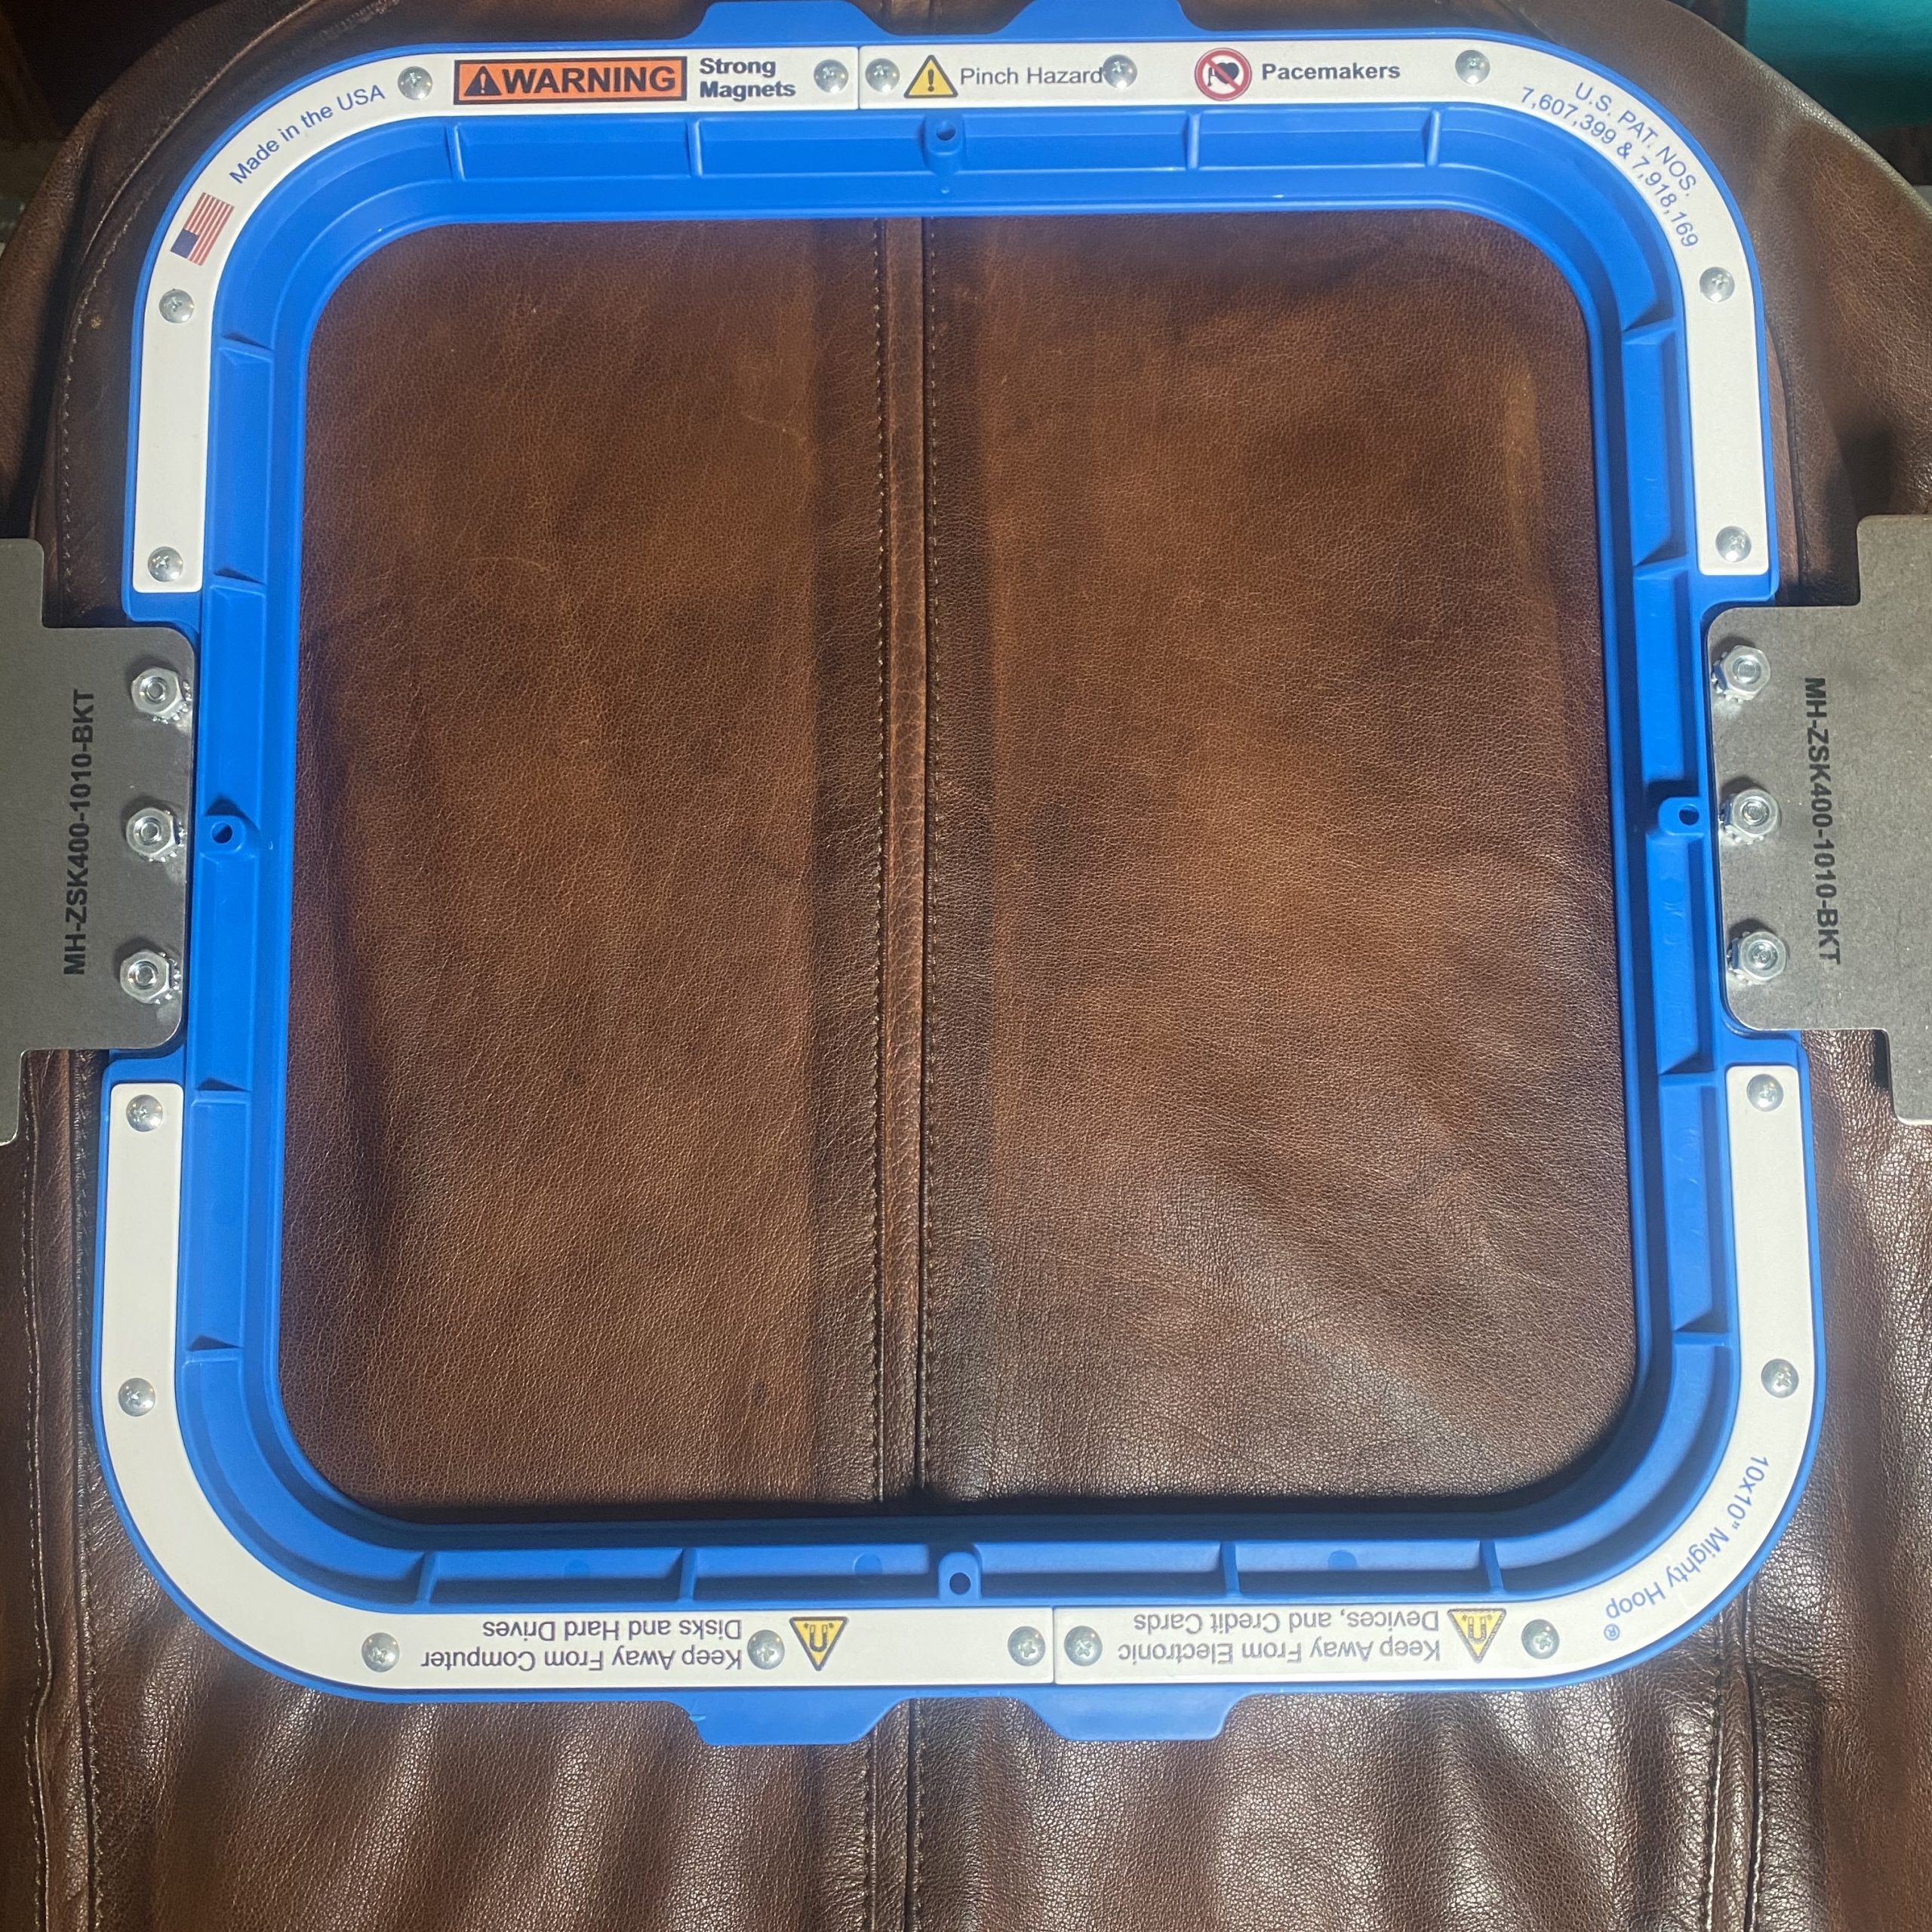
Today I have a relatively new option, which I feel is hands down the best. Magnetic hoops have become extremely popular with both multi-needle machines and home-based drop-in bobbin machines.
Magnetic hoops are perfect for hooping leather and vinyl as they hold the item tightly and in no way damage, scuff or mark the leather.
Magnetic hoops have quickly become one of our favorite add-ons, and if you want to embroider on leather, they are a must, in my opinion, and well worth the investment. On a tubular multi-needle machine, using a magnetic hoop gives you the ability to embroider finished leather goods. These include jackets, bags, and even boots and small items while using some of the optional magnetic hoops.

Type Of Stabilizer
For leather, I prefer using one piece of medium-weight Cut-Away stabilizer. Cut-Away will ensure that the stitches will have a secure surface to lay on and minimize the possibility of the design cutting the leather completely. I have seen “dense” designs embroidered on leather that punched out a hole separating the design from the leather altogether, giving a whole new meaning to the word “cutwork” in embroidery.
In regards to vinyl, it has mostly been used for simple in-the-hoop projects like key fobs, luggage tags, various holders, and other novelty items. The same general rules with using low-density designs apply; however, the stabilizer used is different than leather. Because marine vinyl is generally backed and with an item like a fob or tag, and two pieces of vinyl are used within the process, I suggest using a medium-weight Tear-Away as opposed to a Cut-Away. The Tear-Away will be adequate for the embroidery and will reduce the finishing time of in-the-hoop projects. Generally, these projects only require hooping the stabilizer, not the vinyl within the hoop. Running stitch outlines are embroidered directly on the stabilizer, which shows the placement to lay down your vinyl, this works out well as it reduces material waste.

How To Know If. Design Was Created For Leather & Vinyl
The only other factor to consider is, how do you know if a design will embroider well on vinyl or leather?
To play it safe, think about pretty much any design as not friendly unless the company or digitizer is stating that the design is created for that exact purpose.
The next question is, can a “standard” design be edited or modified to run vinyl or leather? The answer, in most cases is… not very easily! From the digitizing process, the densities of both satin and fill stitches need to be reduced. As an example, a satin stitch’s standard density might be .4mm, for leather that would change to .45mm to .6mm depending on how many layers of embroidered stitches there are. With fill stitches, the standard density is also .4mm, on leather, it would be .6mm, and I might increase the stitch length on the fill if the leather seems reasonable or has a stretch to it. Then when we get to running stitches, the stitch length is generally longer than the 2-2.5mm standard, and you need to be very careful that short stitches are not being generated. Also, all the underlay values change, from the type to the stitch length and spacing. Finally, the pull compensation is minimized compared to standard fabrics because leather tends not to move the way fabric does.
Everything within a design created specifically for leather is watching that the densities and the space between stitch penetrations decrease.
Sound complex? To be honest, it kind of is. Learning the recipes for dozens of fabrics and how they react with different threads and stabilizers can take decades to master. Whether you’re a commercial embroiderer or home embroiderer, no one has that much time to dedicate. So the key is two-fold; if you have the right tools and the right teacher, you pass the learning curve in a fraction of the time!
Savings Time & Money with Hatch’s Fabric Assist Tool
At the Deer’s Legacy, we’ve made it our mission to help those who are willing to put in the time and effort to help get them past this learning curve with our Digitizer’s Dream Course. Knowing the theory behind creating embroidery designs is essential, so you know the why’s and why not’s… but having the right tools for the job will save you time and money.
In my opinion, this is one of the main reasons Wilcom (the creator of Hatch) has been the commercial world leader for decades in the industry. Because the EMB embroidery file native to Wilcom is object-based, the properties can be changed with the click of a button using their Fabric Assist tool. Meaning that a person without a decade of experience can achieve better quality results because the recipe, in this case, “leather,” can be chosen, and all the properties I mentioned above will be modified automatically within an embroidery design.


This tool was previously only available within Wilcoms commercial platforms, but it is now accessible to the home industry for a much more affordable price with Hatch embroidery software. Accessing these tools opens up a whole new world for hobbyists and home embroiderers, as we can now have quality commercial results at a fraction of the cost.
Conclusion: Embroidering On Leather & Vinyl Doesn’t Have To Be Difficult
As you’ve now learned, there are many factors to consider when embroidering on leather and vinyl. The needle size, thread, stabilizer, hooping technique, and your design pattern are all important factors to consider.
After using your knowledge of how to implement these factors properly, you should see an improvement in your embroidered results. If you’re interested in digitizing your own designs for leather and vinyl usage or adjusting existing designs using Wilcom’s famous Fabric Assist tool, click here to download a 30-day free Hatch trial today. As a bonus for downloading it through us, we’ll also provide you with some exclusive education & bonuses to help you get past the learning curve quickly.
Enjoy your embroidery time in leather-leather land (bad pun, I know)… Happy stitching!

Thank you
Thanks for reading Carolyn!
I was always concerned about the parameters needed to embroider on leather. Thanks for this information. I will play with the fabric assist function and see how it goes.
Great to hear! Thanks for reading Tammy 🙂
Thank you for this incredibly helpful information! I am so happy that the Fabric Assist function is available on my Hatch 3!
Truly the best software out there!
We’re so happy to hear Amy!
THANKS SO MUCH LOVE IN THE HOOP THINGS SO EASY
Glad you love the project Carol! Be sure to share your stitchout with us 🙂
I was on my phone because I don’t always get time to read and play on my computer. I already purchased Hatch 3 through your site and highly recommend that other embroiders purchase Hatch 3 through your site, in addition I also purchased your course because of your knowledge, it’s like a fast track to learning the curve and very valuable information too.
Thanks for your feedback Jacqueline! We appreciate your support 🙂