Over the holiday season, your house may get a little festive; wreaths, lights, and a big old Christmas tree. But with the holiday decor can also come a hefty price tag. How can you create tasteful Christmas decor while still on a budget?


Why Create These In-The-Hoop 3D Ornaments
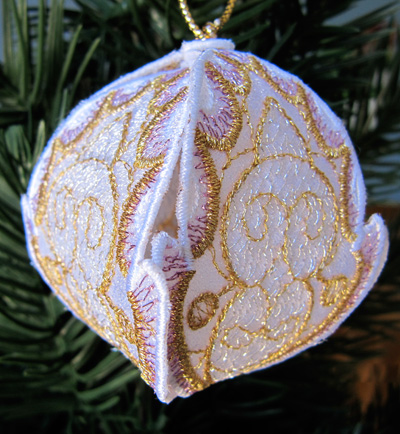
If you’re someone who enjoys decorating for the holidays and has an embroidery machine, well then, you’re in luck! This fun article will teach you how to easily create 3D In-the-Hoop ornament embroidery projects to add that extra special touch to your holiday season.
Personalize these 3D ornaments to go with any room or Christmas tree decor by simply changing the embroidery design, organza, or thread color. Why not add in and experiment with that metallic thread? Your options are endless as to the outcome of your ornament, and you can create multiple ornaments as these don’t take up much time at all! Why waste time going to the store when you can make exactly what you want from the comfort of your own home.
These ITH 3D ornaments make great gifts for your friends or family. Create them as Christmas gifts, give them as party favors on your Christmas table setting as a keepsake, or create a personalized ornament for that new baby’s arrival. There is no better time or excuse to make your own embroidered ornament.
Although these ornaments are great to personalize and give as gifts, the best part is they’re inexpensive! Why not use organza material from your fabric stash at home. Using the thread you already have while finding the perfect ornament embroidery design can help save money in your pocket. Who doesn’t like to have extra cash to spend during the Holiday season (or expand your embroidery or fabric stash)?
Don’t forget when creating your In-The-Hoop 3D Ornaments to use designs from a reputable source. Here at Embroidery Legacy, we offer nothing but high-quality In-The-Hoop 3D Ornament embroidery designs. Click here to check out our 80+ In-The-Hoop Christmas Project Embroidery Designs now.
How To Create In-The-Hoop Embroidery Ornaments
Thankfully, although the finished results of creating these designs are quite impressive, creating them is rather simple.
Here’s an easy to follow video tutorial we created a while back if you find watching an easier way to follow along and learn:
Of course, we also have the written instructions for you to follow here.
Supplies Required For ITH 3D Embroidery Ornaments:
- Wet and Gone stabilizer
- Organza
- Polyester or Metallic Thread
- Soldering Iron (although a good pair of scissors could work too)
- 3D Ornament embroidery design –click here to access our high-quality 3D ornaments
Tip: A stencil cutter/soldering iron will give you visually better results. However, the smell of burning organza may offend some people or not ideal for those with respiratory issues. In this case, a good pair of scissors will do. Instead of burning the design out of the hoop, you can simply cut it out instead.
In-The-Hoop 3D Christmas Ornament Embroidery Tutorial:
Step 1: Hoop Your Organza and Stabilizer
With this first step, you’ll want to begin by taking your wet and gone stabilizer and sandwiching it in between two pieces of organza. As John would say, think about it like an oreo cookie, the white stuff goes in the middle. Choose whichever colors of organza you like.
Once this is done, simply hoop your organza and stabilizer. Ensure that it is hooped tightly so nothing moves while being embroidered.

Step 2: Embroider the Design
Well, there’s not much to say about this step. Load the design into your machine and embroider away!
Step 3: Cut out Your Design
Here’s where you’ll use your soldering iron (or scissors). Keeping your embroidered design secured tightly in the hoop, you’ll next burn (or cut) around the finished design. If you are using a soldering iron, remember not to hold it in one place too long, or it will begin to melt your thread. If you’re embroidering an ornament, you’ll also burn (or cut) through the center areas on the tips of all four ends of the project to create little holes. This is where each end of the design will be tied together to make it into a 3D ornament.

Tip: If you can, use polyester or metallic thread instead of rayon. Polyester is a synthetic thread, and because of this, it tends to do better when exposed to heat. Rayon thread will quickly discolor and burn.
Step 4: Remove the Wet & Gone Stabilizer
Next, you’ll quickly run your project under warm water to somewhat remove the wet and gone stabilizer (hence the name wet and gone). This will cause the stabilizer to become slightly transparent, so the white is no longer showing through your design. It will also make your project remain a little starchy and stiff so you can shape your ornament.
Step 5: Tie Your Project Together (Literally)
While the project is still somewhat wet and malleable from step 4, turn it upside down, so the bobbin stitches are facing upwards, and then bring all 4 of the tips together and line up the tiny holes you burnt (or cut) out. Next, simply take a piece of ribbon or string and put it through each of the four holes to hold everything together.

That’s all there is to it. Congratulations, you just created your very own personalized embroidery ornament!
In-the-Hoop Embroidery Christmas Designs
Of course, here at Embroidery Legacy, we have quite a few beautiful in-the-hoop ornament designs to make both your embroidery machine and Christmas tree happy. Our designs are specially digitized with a low stitch count to ensure they run smoothly and take less time to embroider on your machine (so you can make lots of them for others or yourself!).
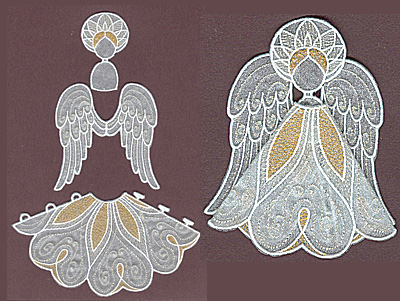
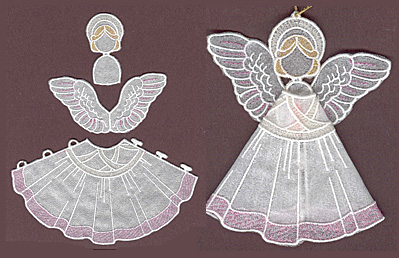
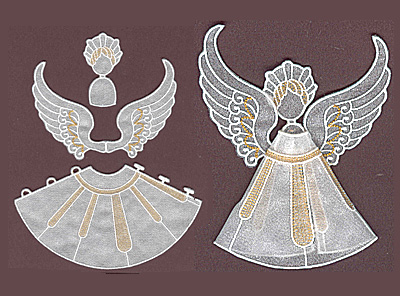
Besides our Ornament designs, we also have in-the-hoop angel designs created in a very similar way using the same tools. Plus, if that’s not enough for you, we also have a complete in-the-hoop nativity scene!


Click here to view our entire in-the-hoop Christmas collection now. With many festive designs to choose from, we’re sure to have something to help decorate your home this Holiday season.
All of the designs shown on this page (plus close to 30,000 other designs) are included within our Embroidery Legacy Design Club. If you want to save money on quality embroidery designs while creating endless creations, click here to learn more.
Conclusion: Deck the Halls with Embroidery that’s Jolly
You now know how easy it is to create beautiful in-the-hoop embroidery Christmas projects with Embroidery Legacy Designs while still adding a personalized touch and saving some extra pocket cash this Holiday season.
Whether you’re looking to decorate your tree, home, or even create a gift for your friends or family, these quick embroidery projects are an easy way to add some festive embroidery fun to your Holiday season.
Merry Christmas from all of us here at Embroidery Legacy, and happy stitching!
P.S. Don’t forget to check out our other 80+ in-the-hoop Christmas embroidery design projects by clicking here to get started on your next embroidered Christmas gift or decor!




Awesome demo. Brand new to this craft and looking forward to making things like this.
Thanks Sue, glad you enjoyed it.
There is no shortage of fun projects to create with machine embroidery 🙂
Love em all but your hoop sizes are different than mine was hoping to download a 4X4 or 4X7 hoop design. I’d have to use a much larger hoop than you show because the dimensions are to big on way or another. The only hoop size I have that will fit both directions is an 8X12, That’s wasting a lot of stabilizer.
Do you have some sizes for us home embroiderers that will fit the home machines?
Don’t suppose you give us the EMB file that we can resize ourselves? lol
my hoop sizes are 4×4, 5×7. 6×6, 8×12.
8×8 is the only size left for my machine but haven’t bought it yet.
Hi David,
Thanks for commenting. Most of the ornaments will fit within a 5×7 hoop 🙂 Here is a link to check them all out: https://www.developdigitizingmadeeasycom.bigscoots-staging.com//product-category/embroidery-designs/in-the-hoop-projects/in-the-hoop-christmas-projects/
Also, yes with most of our designs we do include the EMB file in case you need to resize.
I hope that helps & happy holidays!
That was very interesting, on how you did the three layers. I have not worked with the organza yet.
Glad you found it interesting Shirley. It’s a great material for in-the-hoop projects. Thanks for reading!