Do you hate to be cold yet love embroidery and saving money? If so, you’re going to like this fun and easy in-the-hoop project where you can use your hand as a pattern!

There’s nothing better than using your love for embroidery and being able to personalize it for yourself or a loved one. This project is also a great excuse to spend extra time in your sewing room!
Why Create These Easy ITH Embroidered Fingerless Mittens?
Save your money on buying mittens from the store and create some with spare fabric in your fabric stash (or you can use an old no-longer-used sweater). Cater to your own likes by using colored fabric and threads and specialized embroidery designs. From monogram mittens for your friends to cute cartoon characters for your kids or grandkids, you’ll be able to create personalized mittens for all those in your life.
The best part? This project is very easy & requires no additional sewing! Once a mitten pattern is created, it is very easy to change the design or embellishments used to make mittens to suit all styles.
If you have embroidery software, making these mitts is a no-brainer! Not only are they stylish, but they also keep you warm during these cold months. Let’s get started.
Supplies Needed For ITH Fingerless Mittens
- Embroidery machine
- Embroidery software
Looking for the best machine embroidery & digitizing software? We’ve got an article for that!
- Tear-away stabilizer
New to stabilizers? Check out our embroidery stabilizer guide.
- Fleece (size will depend on your desired mitt size)

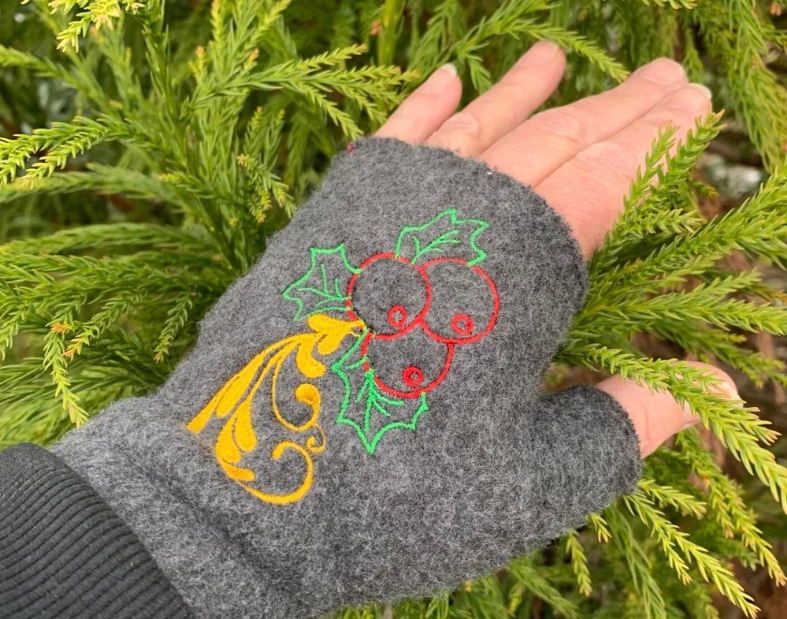
- Embroidery design, for this project we used:
- Holly with berries double applique
- Or use one of our free embroidery designs
- Holly with berries double applique
For close to 30,000 high-quality embroidery designs to perfectly embellish your mittens, be sure to check out our database!
- Embroidery thread
- Spray tack or tape
- Scissors
There are 5 things you need to know about embroidery scissors. Read about it now!
In-The-Hoop Embroidered Fingerless Mitten
Digitizing Fingerless Mitten Pattern
If you’re looking for embroidery software, I highly recommend you download the 30-day free trial of Hatch through us (I’ll even throw in some bonuses) to compare it to the other programs available out there.
Step 1: Trace your hand per the diagram and leave 1/2 inch room for allowance
Step 2: Digitize a placement line (blue dotted line)
Psst. If you’re new (and we all were at some point) don’t forget to check out our what is embroidery digitizing article and our guide to what is the best embroidery digitizing software?

Step 3: Insert a fun pattern of your choice (not too large)
Step 4: Digitize the top edge design, the one by your fingers (PURPLE Line); try using motifs if you like
Step 5: Digitize tack down #1 line in color A (blue dotted line
Step 6: Digitize a final sewing line following the same blue dotted line

Embroidering Fingerless Mittens
Step 1: Hoop tear-away stabilizer
Learn some great embroidery hooping tips and tricks.
Step 2: Float a piece of fleece, right side up
Floating vs hooping your fabric for embroidery, what’s the difference?
Step 3: Stitch design up until the end of the decorative design.
Step 4: Remove the hoop from your machine
Step 5: CAREFULLY tear away the stabilizer in the CENTER of the glove (not outside)
Step 6: Using spray tack (and tape if you like), adhere a piece of fleece to the underside of the hoop, right side up
Step 7: Return the hoop to your embroidery machine and stitch the decorative lines (purple) next to the fingers and wrist
Step 8: Remove the hoop from the machine and, using spray tack, adhere another piece of fleece, the wrong side up to the TOP side of the hoop (so it covers the design), and return the hoop to the machine
Step 9: Finish stitching and remove it from your embroidery machine
Step 10: You should have three layers (two stitched together at the fingers, wrist, and sides; this is the insulated top of the glove. The other layer is a single layer on the palm side of your hand.
Step 11: BEFORE CUTTING…. Tear away the stabilizer around the glove.
Step 12: Trim to ¼ and turn inside out.
Wear and enjoy!
Conclusion: Creating ITH Fingerless Mittens Is Easy & Can Be Perfectly Personalized
These fingerless mittens can be modified to size- made as a traditional mitten. Use your creativity! Switch up your fabric and embroidery designs to create different looks. Save scraps of fleece or use old sweaters to create fun and attractive hand-warming mitts. See where your creativity takes you.
P.S. If you’re new or looking for great embroidery software, try our free 30-day Hatch software trial to start creating your own embroidery projects & see how user-friendly this software really is!

Leave A Comment