Using different techniques within your embroidery can create some amazing results! Among the many techniques, one often forgotten is reverse applique embroidery. It’s not only fun but also creates one-of-a-kind garments. Although it’s similar to regular applique, do you know how to embroider it?

What Is Reverse Applique Embroidery?
You can use reverse applique with most regular applique designs. It is a great yet simple technique.
Reverse applique is very similar to regular applique embroidery. Regular applique involves placing the fabric on the TOP of the garment. On the other hand, reverse applique involves placing fabric BEHIND the garment. Reverse applique adds depth, texture, and dimension to your project by revealing fabric underneath your embroidery design.
Did you know you can use the reverse applique embroidery technique with most regular applique embroidery designs too? Simply change where you place your fabric.
To make reverse applique, hoop the fabric under the garment, embroider your design, trim it, and let the applique show through.
PS Unlock your creative potential by learning 14 diverse embroidery techniques, including applique, with our Embroidery Fun Effects Course. We reveal secrets, tips, and tricks so you can master these embroidery skills.
Reverse Applique Embroidery Designs
Check out our collection of reverse applique embroidery designs.
Here’s a few of our favorites:

Don’t forget to check out our large selection of 3,000+ embroidery applique designs you can use this technique on.
When Should I Use Reverse Applique In My Embroidery?
Do you have a favorite shirt or pants that fit perfectly but have a stain from dropped mustard? Maybe your daughter or grandson had a few too many falls, and the knees in their new pants are wearing thin. Don’t throw them away! This is a great cause to use the reverse applique technique.

From stains and holes to making something new, this technique can enhance your garments as you want.
Stitch Types For Creating Reverse Applique Embroidery
You can create this technique by using either of the two different stitch types: the running stitch and the satin stitch.
When you use the running stitch, it will show the raw edge of the fabric.
When you use the satin stitch, it will show a clean edge. Before embroidering your last satin stitching, you need to cut away the top fabric.
The satin stitch’s final result looks similar to regular applique. Use this stitch type only when removing a stained or damaged part of your clothing.
Reverse Applique Embroidery Tutorial
Step 1: Place the Fabric While Hooping

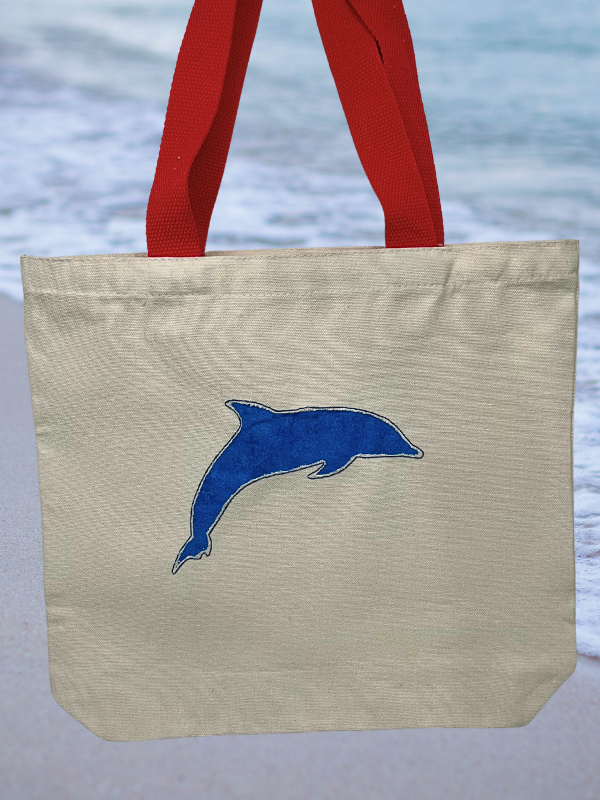
Put the applique fabric (dark blue fabric in this photo) underneath your garment to embroider (canvas material in this example). Hoop the garment this way and place it on your machine. You don’t need a stabilizer since the design only consists of running stitches.
Step 2: Embroider Your Reverse Applique Design

Each design should be fairly quick to embroider. After it finishes embroidering, take the embroidered garment off the hoop.
Step 3: Trim The Applique Fabric From Behind

Turn the garment inside out and trim the applique close to your design using applique scissors. When we finish the project, you will not be able to see the inside of the design.
Step 4: Trim Your Garment Material

Flip the clothing so it’s right-side-up, and separate the fabric from your material using two fingers.
Carefully trim along the inside edge of the running stitch, only cutting your garment material. This will reveal the applique fabric underneath for a reverse applique effect. How much of an edge you leave will depend on the look of the edge you want. Leaving space makes a long fringe; cutting close causes short fraying of the fabric.
Step 5: You Have Completed It!

This is what the design will look like before you launder it. After you launder the garment, the exposed edges will fray depending on the garment material you embroidered on.
Conclusion: Try This Technique For Some Serious Fun!
Now you know how to use reverse applique with machine embroidery to create unique projects.
P.S. Don’t forget to check out our 3,000+ applique embroidery designs to embellish your next embroidery project perfectly! Plus, want to learn 14 other amazing embroidery techniques? Skyrocket your creativity with our fan-favorite Embroidery Fun Effects Course.


I have logged in 3 times and each time it says I am already in the system, please log in. The above does not indicate that if I am in the system I am not eligible. Is this not false advertising? Kindly advise. Thank you.
Hi Violette, which system are you referring to? Ultimate Stash? If you are trying to download a free design please note that it is only 1 per customer (or else everyone would download our entire data base of 25,000 designs & we’d have no buisness). That being said, if you already have an account than yes, you cannot create another one just to get another free design. If you haven’t crated an account yet, please contact our support team & we’ll get you sorted promptly. Thanks & have a wonderful day!
– Jesse
What an incredible, instructive, moving, fascinating article. Such enormous amounts of contemplations, and demand replied. Need my magnifiers for it yet it is all things considered satisfying.
A commitment of thankfulness is all together for the balanced piece.
Thanks for the kind words! Glad you enjoyed it!
Hi there! Such a good post, thank you!
My pleasure Neva! Glad you enjoyed it 🙂
Thank you John, reverse applique technique so cool. You have so many great fun ideas 💖❤️
Thanks for reading Shariffa! Let us know what you think after you try out this technique