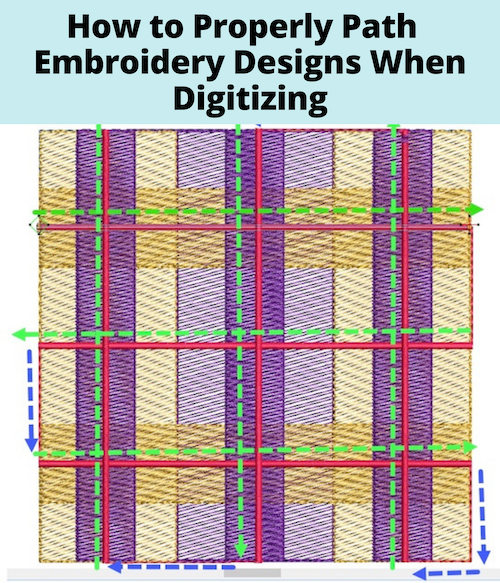
Who can remember Dorothy skipping down the yellow brick road with her friends from the Wizard of Oz? The shiny yellow path led the way, and she followed it through thick and thin to the end of the rainbow. Although pathing isn’t always that fun and exciting in embroidery, it is functional and necessary to make any embroidery design run smoothly on your machine (which saves you from frustration)!

In this article, we’re going to go where no one thinks they want to go, but after you practice a little, you will be the pathing master! We will discuss what pathing is, bullet-proof designs, and a bit of the theory behind why it is important.
Before we dive in, if you’re interested in creating/editing embroidery designs or just want to become a better digitizer, I highly suggest you enroll in our popular Free Embroidery Digitizing 101 Course. This 20-minute video course will give you a solid foundation of digitizing (yes, including pathing) and also includes a very helpful printable cheat sheet PDF!
What Is Pathing In Embroidery Digitizing
Pathing is the art (and it is an art) of looking at artwork and determining the objects you need to get your design made and then creating an order or “path” for the machine to follow. We often forget that embroidery machines and computers are machines. They do what we tell them to do, and most often, if something is wrong, we told them to go there.
Pathing has many components, but let’s break it down into a model we can understand. Imagine a super hot and cheesy pizza fresh from the oven- half is pepperoni and half is veggie. The crust is our foundation (the underlay and the stitching layer on top), then a layer of sauce which covers the whole thing (a layer of stitching), and then our toppings (more layers of stitching). By playing around with these, we can improve our design. Without getting too hungry, keep that picture in your head; you will need it in a bit…
Why Is Pathing Important When Digitizing?
Pathing is important because it allows the design to stitch out quickly with few trims and give you soft, supple embroidery. Given we used to run one of the world’s largest quality digitizing companies (where we did work for companies like Disney, Levi’s, John Deere, etc) we stand behind investing the time to learn theory and then put that to use is the best way to create the best stitchable designs.
Pathing creates soft designs, but it also creates designs with fewer needle and thread breaks, less stress on your machine, faster stitching time, and more peace of mind.
Preventing Bullet-proof Embroidery Designs
When John speaks about “bullet-proof” embroidery, he refers to the density of the stitching caused by either too many trims or too many layers. Bullet-proof can also come from crowding stitches. Ever felt uncomfortable in a crowded concert? An airport? There are too many people pushing and shoving, and we get cramped. Stitches get cramped too! Too many of them can create waves; too many on top of one another can break needles. Too many trims are uncomfortable to wear.

Pathing helps to reduce the amount of stitches and trims through fewer layers, making the embroidery more supple. As you see better and better results, you will want to digitize so that the designs come off the machine with an “OOOooo,” not an “eeeewwww”.
Interested in quality embroidery designs that stand out? Check out our large variety of close to 30,000 embroidery designs by clicking here. Remember to learn from these designs! We include native files so that you can see how each design is put together and how they progress from one place to another! Use the stitch player as a great teaching tool.
Embroidery Digitizing Theory
I can feel everyone cringe. Theory…. Eeew ick. Sorry folks, it is a necessary part of learning to digitize well, and the more you do it, the easier it will become. Anyone who likes puzzles will be delighted because pathing is just a big puzzle which has a goal of the fewest stops.
This is a way of thinking about pathing…

Remember the puzzles in which you had to draw this “simple” envelope without lifting your pencil? (I am convinced it is impossible, and others must be too because there was a box below to tick if you thought it was unsolvable). Pathing tells the machine to start at one point and continue without stopping to trim if possible.
Why Reduce Trims/Stitch Time In Embroidery?
In the commercial embroidery world, reducing stitch counts and keeping machines moving at the highest reasonable speed is a sure way to increase profits.
For every trim, you lose approximately 120 stitches, and that adds up! Let’s say you have 25 trims in a project. For each one, you lose 120 stitches; at 700 spm (stitches per minute) you just lost 4 minutes 15 seconds. If you run that project, say, 15 times for a client, you have just lost over 1 hour of stitching and tending time.
Aside from the additional time, additional trims means more scratchy knots. Anything you can do to reduce the texture of the back of the design is important.
Pathing Success With Unusual Fabrics
Pathing is also critical when embroidering unstable materials. Ripples and puckers surrounding designs on thin or stretchy fabrics can be so frustrating. Dense stitching or poor stabilization can cause these problems, but using too much stabilizer and hooping too tightly will not solve this. Poor pathing can explain some of these problems.
Pathing Causes Fewer Registration Problems
When embroidery stitches, it pushes a ‘wave’ of the fabric ahead of the stitching. Ripples are caused when you stitch toward a section that is already stitched to the stabilizer. Imagine you have a rug sitting on a wood floor. Moves around a bit when you walk on it, right? Now imagine a sofa sitting on the rug; it has anchored it down. You are vacuuming this floppy rug toward the couch, which does not move, and you cause a ripple that ends up against the sofa. Well, now you have a wave of fabric trapped by the couch on one side and you and the vacuum on the other!

Careful pathing can help you to get the rug cleaned and have it stay flat! In embroidery, it can help you to create a soft, supple stitchout with the fewest trims possible. By pathing your design correctly, you will not have to use layers and layers of stabilizer to make up for a poorly planned design.
How Does Pathing Work When Digitizing?
To understand how pathing works, we will use a bit of a different visual to illustrate. Imagine you are in a baton race. Your team of four gets from point A to point B by running a bit then handing off the baton to the next person. Unless you drop it (uh oh…bad), you get where you need to go quickly. Dropping the baton means that you have to stop and pick it up, causing a delay and losing the race… That’s a trim.

The illustration above is just a line- pretty simple, right? Let’s get a bit harder.
Pathing From Object to Object
An “object” in embroidery can be anything. A single stitch is technically an object, and all objects have one thing in common. They all have a start and stop. In Hatch software, the start is indicated by a green diamond. A stop is a red plus sign.
Want to create or edit custom embroidery designs? Click here to download your free 30-day Hatch software trial through us & receive some amazing bonuses such as lessons that teach… You guessed it, pathing.
To move from object to object, we must have a start and a stop point in each one. The very beginning of the design or object will have a start diamond and then a series of stops which each have a new start on top of it. This goes on and on like a daisy chain until you reach the end, the final stop plus sign.
In our pathing road race, there are winners and losers. The winners have the least trims. Here is another picture to help you think of how objects relate.

Layering In Embroidery
Let’s take just a moment to talk about how many layers we want in our embroidery. Remember that too many makes for thick bullet-proof stitching, so we try to cut down when we can. Most objects have an underlay to give a great foundation, but if we have layers, we don’t need it because our first layer can function as our foundation.
In the illustration above, you see three objects; the oval, triangle, and lightning bolt. The winner has placed the start and stop correctly, so they line up like the road race, and there is only one trim. The loser lost because their second stop was at the bottom of the triangle, and then there is a jump to the new start. In some machines, this can cause a long jump stitch you will need to trim later.
Okay… take a breather… a lot to know, right? Pathing was such a mystery until I learned to use it to my advantage and treated it more like a puzzle than a problem. You will not get pathing right every time but rest assured it will come with time. Okay, now for the pizza.

It is time to talk pizza: crunchy chewy crust, a layer of sauce, layer of cheese, and layers of goodies. Even if we think that more is better, often it is not. Let’s add another layer of crust. OOooo way too heavy. More sauce? Too sloppy. More cheese? (okay, more cheese is good.) But you get the idea. The best pizza has one great crust and then carefully added layers of sauce, cheese, and toppings for the perfect balance.
Embroidery is the same. If we know that we will be layering a lot of stitching, we have tricks to lessen the load. Always be mindful of a good foundation.
- Eliminate the underlay. This is best done with the Tatami stitch, which has short stitches which are more stable.
- Lessen the density of the layer. If you cannot remove an underlay (or shouldn’t), lessen the density by increasing the width between stitches or lengthening the stitches themselves.
Check out our YouTube video on Hatch Smash below to learn how to lighten tatami for a great underlay.
- Be thoughtful about the number of cutouts- keep the underlay unbroken. Many times new digitizers have a design with lettering or other shapes laid over a foundation, and they are tempted to “cut out” a hole in which their letter or shape will sit. They are rightfully thinking that having “one layer” of stitching will work the best, but by doing that, they have destabilized the foundation (basically pulling bricks out) and created many more stitches!
Check out our YouTube video on how to embroider more production-friendly designs below; these simple tips & tricks should be applied to your embroidery!
- Make sure to use your “fabric select” tool. There are several cases in which this helps with density.
What Is A Layer Of Stitching In Embroidery?
A layer of stitching is just that. Even a line of stitching on top of another creates another layer of stitches that add to density. We have to be thoughtful of how many we accumulate by watching what kinds of layers they are and what colors.
Color Layering With Embroidery
Color comes into play in our pathing pizza because we want to be economical. You would not put a layer of sauce on one side and cheese on the other, then go back to the sauce, right? Methodically we put down a layer of sauce, then a layer of cheese, etc. Same thing with colors. Look at your design. If you have two areas of color, it makes sense to stitch those in the same layer to eliminate trims unless the design calls for it. If you do not, you end up going back and forth from color to color, and this adds a lot of effort for single needle stitchers.
So you decide what areas you need in a certain color, but they are far apart! Now what? Use a running stitch! Use that stitch to travel from the first object to the next without dropping the baton and creating a trim.
Remember to create the object, then the running stitch, then the second object so that they stay in order and preserve the pathing.
What If I Can’t Put A Running Stitch Across My Design?
Go undercover! Be sneaky and hide it under another object, the border, anywhere you can think!

Does it always work? Nope, sorry! Sometimes we end up with a trim. But tricks like this can help the overall feel of your stitching. Below you will see what this would look like with your starts and stops.

Wait, wait, wait! What is happening with the pentagon on the left? Here’s your answer… the blue shape stitches first starting from the lower right and then ending where we will begin our next color (layer). We choose to start the pentagon there so that the end stitch is perfectly placed to begin the traveling stitch to the oval where we will end.
Ensure you have your start/stop lined up and use your “design information” tab to keep checks on how many trims you have. You can also see trims by turning off “true view.” Starts will be circles and trims triangles.
A little bit unrelated (but still important), we must say that you can have issues playing around with your start and stop. If you have an object which has the start on the bottom and stop at the top, it will stitch from bottom to top. If you move the start to halfway up the object, the machine takes you literally, and it will start in the middle and stitch up. But it has to finish the bottom, so it goes to the very bottom and then stitches to the finish point. This can have two effects; one is a gap in the stitching because pull on the fabric will pull the stitching out of alignment or overlapping because push squishes the stitches together.
Often in discussions, you will see people ask, “why is this line in the middle of my tatami stitching??” Here is why.

Move your start and stop so that it starts on one side, then stitches to the other, keeping in mind what the stitch angle is.

Oh wow, a lot to take in, right?
Tips For Pathing and Smart Digitizing
- Want a more in-depth look at pathing? Check out our Digitizers Dream Course, where John goes over the key of embroidery education; theory! We’ll go over the why and when to do things within your digitizing. This hands-on course will give you fundamental knowledge that the last Schiffli Master, John Deer, has to share, and what’s even better is it’s taught in 10 of the industry’s leading software brands.
- Check out John’s Digitizing Made Easy Book.
- Start with simple designs.
- Use the stitch player! Make use of the tools which show your stitch out.
- Watch your design stitch; you learn the most there.
- Purchase reliable designs which are digitized to stitch well and watch the stitch player on them. Learn how a master approaches a design and then try it yourself. If you’re interested in quality embroidery designs, check close to 30,000 of ours out by clicking here.
- Make use of the incredible wealth of knowledge in our Digitizing Made Easy Facebook group and Wilcom Hatch Embroidery Software Facts Facebook group. Our social media community is great, and we all love to help.
Conclusion: Pathing While Digitizing Is Essential To Quality Embroidery
Pathing is creating an order or “path” for your machine to follow; this is essential to digitizing quality embroidery! Without proper pathing you end up with bullet-proof designs (designs with too many layers or trims).
Knowing the theory behind why and when you digitize is essential to reduce trims and stitch time. It is critical when embroidering unusual fabrics and causes fewer registration problems. Theory is also important in pathing object to object, helping to create the least amount of trims, resulting in amazing embroidery!
Looking for the fastest way to learn how to create/edit your own embroidery designs? Learn the key theory behind digitizing by enrolling in our fan-favoite Digitizers Dream Course. To craft quality embroidery designs, you can’t play a guessing game. Knowing how to properly path and when and how to use certain techniques is essential to producing stunning and soft embroidery designs. Click here to learn the secret on how to create the perfect designs for an occasion and personalize any project! This course has proven results. The next step of your embroidery legacy begins with ours.


Leave A Comment