We are jumping into the way-back machine this week, friends! Going to jump way, waaaay back to 1850, stop for a malted at the local soda shop in the 1940s, and beyond. What could be interesting in which spans such a long history? Chain Stitch and chenille embroidery, of course!

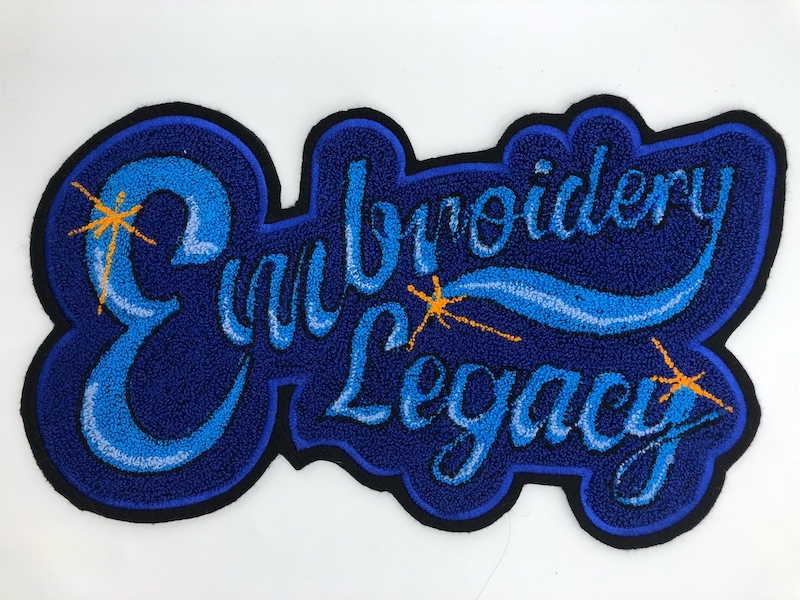
Check out this lovely chenille Embroidery Legacy design created by our very own Christine Buhr.
There has been much interest lately regarding the faux chain stitch and chenille embroidery. These are both made, along with a myriad of other stitches, by Cornely Machines, first invented in the 1850s! This story is colorful and interesting with patents and a talented female workforce. These were the first embroidery machines—the grand-daddy of your Janome or Brother. Without the innovation of some creative thinkers, you would not be making shirts and in-the-hoop projects…. So without further delay, please meet the Cornely Embroidery Machine.

History of the Bonnaz and Cornely Machines
Antoine Bonnaz was born on December 17, 1836, in Versin, France. His family had a history of gun-making along with other machinery. As a child, school was not compulsory, and he amused himself by tinkering with machines and creating things such as a wooden clock, cutting the gears en mass.
Joseph Jacquard developed his loom in 1800, and Barthelemy Thimonnier invented the sewing machine in 1825.
Attracted by these machines, Antoine received work as a mechanic in a silk factory. As he worked with the hand-embroiderers, he was compelled to think of ways to reproduce their handiwork with a machine. Basing his invention on Thimonnier’s sewing machine but also solving design problems, he obtained the patent for his machine called “couso-brodeur”, meaning “sewing embroidery” in 1863. After receiving his patent, he sold it to the firm Hurtu et Hautin in Paris, who were well known for making cording machines and produced bicycles and, later, motor cars.
With that history in mind, now enters the star of our show…. Ercole Cornely.
The patent was eventually acquired by Ercole Cornely in Paris, who made improvements by developing a hook-shaped needle that could create a line of chain stitches. These were the first machines to accurately and quickly create a chain stitch which imitated the work done by hand on a tambour frame. They were easy to use, could be used in the home or a small workroom, and as the mechanism developed, it became difficult to distinguish machine stitching from hand sewn.
In addition to that, Cornely improved upon the original designs, creating machines capable of making chenille (called a moss stitch), braiding, taping, and other designs. The machines were wildly popular and truly created a female-based industry as the earlier hand embroidery workforce was composed almost solely of women. This meant you or I could purchase a machine and use it at home to create linens, adorn clothing, and more.
Uses Of The Cornely Embroidery Machine
The versatility of the Cornely machine is extraordinary! You could walk into a home and stand on a rug created by a Cornely machine, put your embroidered umbrella in the stand, take off your embroidered hat, and hand over a luscious embroidered coat. There was no room that could not display some of these stitches.
These machines are particularly tough- they can stitch through leather, vinyl, wool, felt, and then work on silk or cotton bobbinet just as easily. They are remarkably simple machines, and a trained operator can do the maintenance.

One of the ways in which this machine is so unique is that its movement is controlled by hand. Under the machine, there is a handle that allows the operator to guide the machine. How does it work? Your left hand secures the fabric, and your right-hand turns the handle under the work surface. If you want to go right, you rotate the handle to the right- make a circle? Turn the handle in a circle. You are basically “drawing” with an embroidery machine.

Of course, there is a huge learning curve, and it can take many, many years to become proficient on these machines. But let’s look at some of the basic stitches possible on the Basic Cornely “A” machine.
Chain Stitch Using A Cornely Embroidery Machine
We have mentioned chain stitch, but what is it really?
For those of you who crochet, you know that you take your hook and dip it through a loop of yarn and hook the next section of yarn, pulling it through the previous loop. Chain stitch is precisely that! It is a hook piercing fabric, picking up a loop of yarn (Cornely embroiderers often will call anything from a thread on up to heavyweight “yarn”) and pulling it to the surface. The machine’s round foot, protected by a rubber ring, will advance and press down while the foot drags the fabric ahead, slightly positioning it for the next stitch. If you want to see this in action, there are many videos on Youtube!
Chain stitch is quite versatile, from sailor caps with your name jauntily stitched across the brim at a fair to extravagant lace curtains on netting with cutwork. The art is using stitches to highlight the areas you want to emphasize in combination with luscious colors. The effect when looking at the surface and looking at it held up to the light is amazing.

Chain stitching does not just come in white; of course, the thread used in a Cornely machine is as varied as the rainbow, and all of the threads you use on a commercial machine can (with a small needle) be used too! Generally, a heavy weight 12wt cotton or wool thread is used.

Chenille
Chenille is a little different. Originally called “moss stitch,” it imitates fluffy moss. Instead of pulling a loop through another loop, it pulls that loop up and then advances to the next stitch. Chenille needs to be tightly packed to fill in even the smallest areas and is generally used for fills only. It needs to be treated on the back- often, people would glue the back, but when packed tightly, the overlapping stitches lock in the stitches underneath. The top side can be left as loops, trimmed, and occasionally you will see it brushed out into a wooly texture.
Chenille is either made in wool yarn (12wt) or cotton and is not generally washed. Chenille is most often seen on letterman Jackets and “old school” patches on biker jackets. Currently, it is in favor for textiles, pillows, etc.

Braiding/Taping Cornely Embroidery Machine
Braiding and taping are basically the same thing; the Cornely B machine has the added feature of a tower which holds a spool of Rice Braid (think shoelaces) in varying weights or Soutache which is a corded braid of two cords held together with a continual figure 8 of silk or rayon thread. The tape or braid is fed through a hollow tube that replaces the regular needle bar, and it comes out the bottom and is fed through a special foot that allows the needle to stitch onto it.
The ability of the machine to turn and “draw” makes it easy to create wonderful patterns, just like with plain yarn. You will most commonly find taping and braiding in military uniforms, dresses of the Civil War, and later and couture dresses of the 1940s and 50s.

Twisting/Cording Cornely Embroidery Machine
Later machines of Cornely’s design included those which could twist a cord or thread around the basic thread creating wonderful textures. Altering the texture or thickness of the added cord could create marvelous designs.

Other Stitches On Cornely Embroidery Machine
Of course, we could go on and on (and on) but know that almost all of Cornely’s machines did the basic chain stitch as well as chenille. Machines after the A machine each had one or more added features such as sequins, beads, twisting, rope stitches, double stitching, stitching with the design underneath the machine bed. They could have 1, 2, or 3 needles running at one time, and you have but to look at a Couturier to see a tiny fraction of the innovative ways of using this machine.
Modern Equivalents To The Cornely Machine
Of course, now we have your attention…. And you want to know how you can create some of these wonderful textures and stitches. Well, this has been a project we have been thinking about and experimenting with. A few tutorials in our Wilcom Hatch Embroidery Facts Facebook group have included “faux” stitches for you to consider, click here to access our free tutorials.
Do you want to learn more about Hatch software? Click here for a free 30-day trial of Hatch where you use it like you own it! Don’t forget to join our Wilcom Hatch Embroidery Facts Facebook group by clicking here for tips, tricks, and free tutorials to show you how to try experimenting with different stitches.
On our Embroidery Legacy Youtube channel, John demonstrates embroidered techniques that can easily be followed and put into practice for you to try yourself. Check it out below.
Let’s look at some modern takes on this traditional machine embroidery!
Commercial Embroidery Machine: Chenille, Chain, and Taping
The pillow you bought at the home store with the beautiful chain stitching was done on a commercial machine such as the Tajima or ZSK machines. These modern machines have ingenious upgrades that allow the embroiderer to create a chenille or chain stitch with a hooked needle or add beads, sequins, etc., to a traditional embroidered design. These are specialty machine attachments, but they faithfully reproduce what Antoine Bonnaz and Ercole Cornely dreamed up.
Faux Chenille
Believe it or not, you can create a “faux” chenille stitch on your machine. While it is not looped in the traditional way, the texture as an embellishment is quite nice! Check out our video below for more information on how to use this and other effects together.
Faux Chain Stitch
Faux chain stitching can be made, creating a motif shaped like an arrow. A simple search in our Wilcom Hatch Embroidery Facts Facebook group will show you simple ways to create a motif and use it as a “line.” Here is a wonderful example of using a motif with heavy thread by Linda Rayburn to create an excellent faux chain stitch.

Threads
When stitching on your own machine, you will want to consider using a heavier thread; as there are many options, a 12wt Cotton, Rayon or Wool are good choices. Remember that you need a larger needle for these, at least a 10/16.
Conclusion: Check Out Chenille & Chain Stitch Embroidery Possibilities
Well, you are probably exhausted from our journey from 1860 to today. We’ve covered so much; let’s recap some of the things we touched on.
- Cornely Machines are extraordinary, as they can stitch through leather, vinyl, wood, and felt while stitching through silk or cotton just as easily.
- Look at our Faux chenille stitch video and check for updates on using these.
- Try making a chain stitch motif to be used as a decorative line or fill- a discussion can be found in our Wilcom Hatch Embroidery Facts Facebook group.
The biggest takeaway from this week’s discussion is not to be deterred! Antoine Bonnaz was an inventive engineer who never went to school and liked to tinker. His experiments with wooden clocks brought you the embroidery machine you use today! Look everywhere for inspiration, look at textures, try something new, take a class…. It’s all there for you, and we will be with you every step of the way. You’re part of the family, the Embroidery Legacy Family. Until next time, happy stitching!
P.S. Don’t forget to subscribe to our Embroidery Legacy YouTube channel by clicking here to keep up to date with special effects & techniques you can use within your embroidery and digitizing journey.


Thank you for such a nice and helpful article.
Thanks for reading Marina 🙂